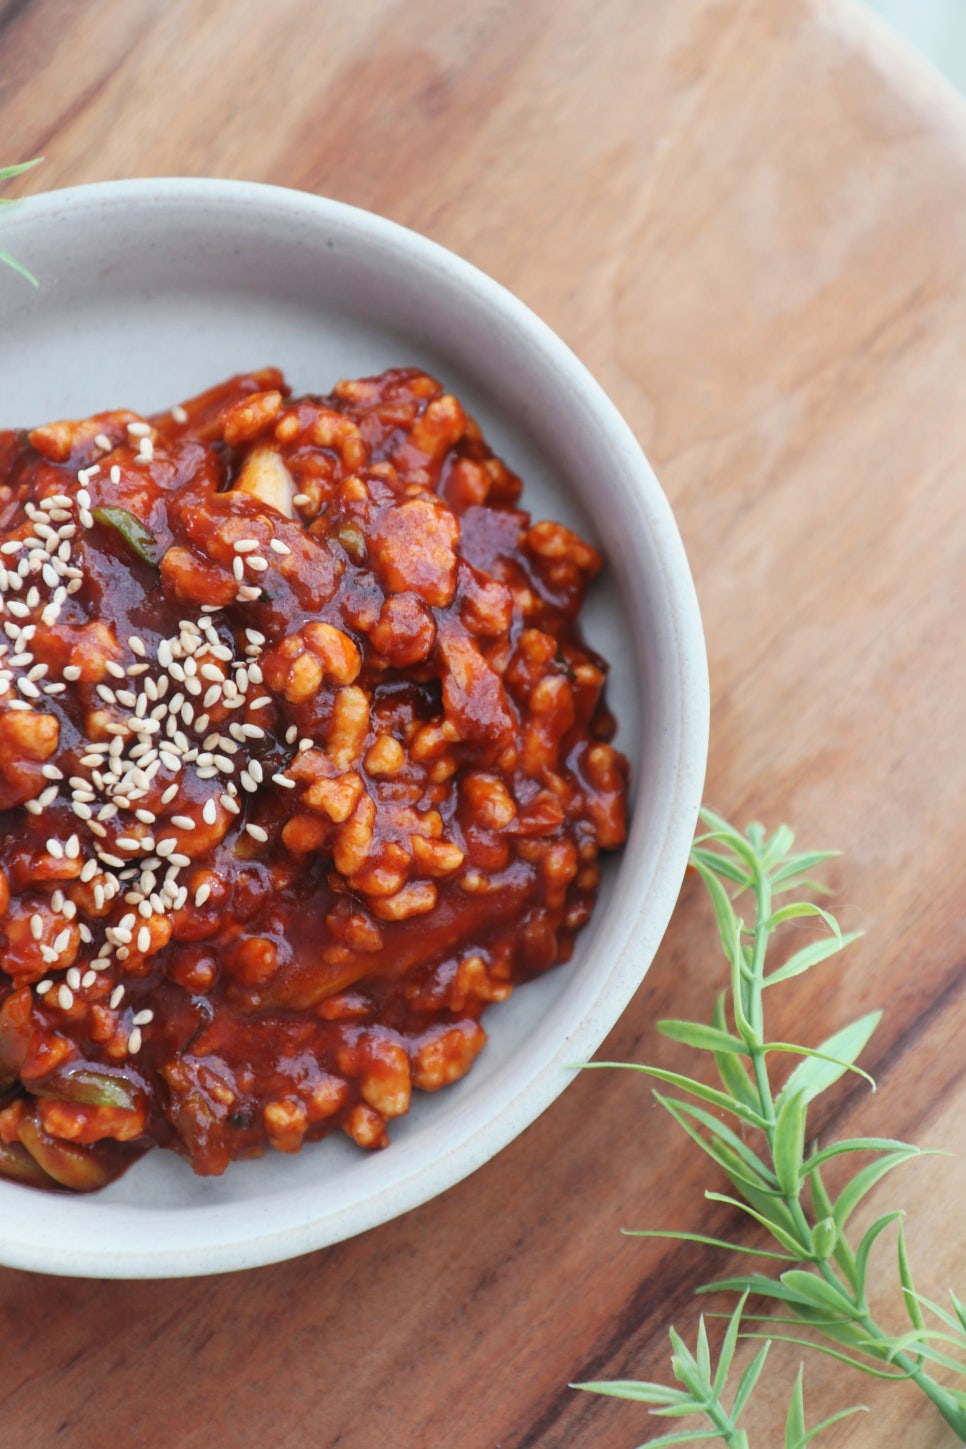
NEW

  • Bokkeum Gochujang Recipe (Korean Stir-Fried Gochujang Sauce with Beef)

    Bokkeum Gochujang Recipe (Korean Stir-Fried Gochujang Sauce with Beef)

    Bokkeum Gochujang is a Korean stir-fried gochujang sauce made with ground beef, gochujang, onion, green onion, garlic, sugar, soy sauce, and oil.

    This is one of the most useful Korean sauces to keep in the refrigerator. Once made, you can enjoy it with rice, bibimbap, lettuce wraps, cabbage wraps, noodles, or simple vegetable side dishes.

    The sauce is savory, spicy, slightly sweet, and rich. Because the vegetables and beef are cooked down slowly, the flavor becomes deeper and the texture becomes thick enough to mix easily with rice.


    What is Bokkeum Gochujang?

    Bokkeum Gochujang means Korean stir-fried gochujang.

    “Bokkeum” means stir-fried, and “gochujang” is Korean red chili paste. This dish is made by stir-frying aromatics, ground meat, garlic, sugar, soy sauce, and gochujang until the sauce becomes thick and concentrated.

    It is commonly used as a ready-to-eat Korean sauce for bibimbap, rice bowls, wraps, and quick meals.

    If you keep a container of bokkeum gochujang in the refrigerator, you can make a simple meal anytime by mixing it with warm rice, sesame oil, and a fried egg.


    Recipe Information

    Prep Time: 10 minutes

    Cook Time: 20 minutes

    Total Time: 30 minutes

    Servings: 6 or more

    Difficulty: Easy

    Cuisine: Korean

    Main Ingredient: Gochujang and ground beef

    Best Served As: Korean sauce or side dish


    Ingredients

    Main Ingredients

    1 cup ground beef

    2 cups gochujang

    3 cups finely chopped onion

    1 cup finely chopped green onion

    1/3 cup minced garlic

    1 cup olive oil or neutral cooking oil

    Seasoning

    1/2 cup sugar

    2 tbsp soy sauce


    Ingredient Notes

    Gochujang

    Gochujang is the main ingredient of this recipe.

    It gives the sauce its spicy, savory, slightly sweet, and fermented Korean flavor.

    Because gochujang brands vary in saltiness and sweetness, taste the sauce near the end and adjust carefully.


    Ground Beef

    Ground beef adds richness and savory depth.

    It also makes the sauce more filling, so it works well as a quick rice topping.

    Ground pork can also be used instead of beef.


    Onion

    Onion adds natural sweetness and moisture.

    Use finely chopped onion so it cooks down smoothly into the sauce.


    Green Onion

    Green onion adds aroma and a savory base flavor.

    It becomes sweeter and deeper as it cooks in oil.


    Garlic

    Garlic gives the sauce strong Korean-style depth.

    Add it with the ground beef so it cooks into the sauce without burning.


    Sugar

    Sugar balances the saltiness and spiciness of the gochujang.

    It also helps the sauce become glossy and slightly caramelized.


    Soy Sauce

    Soy sauce adds savory depth.

    For extra flavor, pour the soy sauce along the edge of the pan so it lightly sizzles before mixing into the sauce.


    Oil

    Oil helps cook the onion, green onion, beef, and gochujang evenly.

    It also helps preserve the sauce and gives it a rich texture.


    How to Make Bokkeum Gochujang

    Step 1: Prepare the Ingredients

    Finely chop the onion.

    Finely chop the green onion.

    Prepare the ground beef, minced garlic, gochujang, sugar, soy sauce, and oil.


    Step 2: Stir-Fry Onion and Green Onion

    Heat a pan over low heat.

    Add 1 cup of oil.

    Add 3 cups finely chopped onion and 1 cup finely chopped green onion.

    Stir-fry over medium-low heat until the onion and green onion soften and become fragrant.


    Step 3: Add Ground Beef and Garlic

    When the onion and green onion become aromatic, add 1 cup ground beef.

    Add 1/3 cup minced garlic.

    Stir-fry over medium heat.

    Break up the beef as it cooks so it does not clump together.


    Step 4: Cook Off the Moisture

    As the beef and vegetables cook, they will release moisture.

    Continue stir-frying over medium heat until most of the moisture evaporates.

    The mixture should look less watery, with oil remaining around the ingredients.

    This step is important because removing moisture helps the sauce last longer and taste deeper.


    Step 5: Add Sugar

    When most of the moisture has cooked off, add 1/2 cup sugar.

    Stir-fry well so the sugar dissolves and coats the beef and vegetables.

    The mixture will become slightly glossy.


    Step 6: Add Gochujang and Soy Sauce

    Add 2 cups gochujang.

    Add 2 tablespoons soy sauce.

    For deeper flavor, pour the soy sauce along the edge of the pan so it sizzles slightly before mixing.

    Stir everything together until the gochujang is fully combined with the beef and vegetables.


    Step 7: Stir-Fry Slowly

    Reduce the heat to low.

    Continue stir-frying for at least 10 minutes.

    Stir often so the sauce does not stick to the bottom of the pan.

    The sauce should become thicker, darker, and slightly stiff.


    Step 8: Reduce Until Thick

    Keep cooking until most of the moisture is gone.

    The finished bokkeum gochujang should look thick, glossy, and concentrated.

    It should not look watery.

    This helps the sauce keep better in the refrigerator and gives it a deeper flavor.


    Step 9: Cool Completely

    Transfer the stir-fried gochujang to a bowl or container.

    Let it cool completely at room temperature.


    Step 10: Store and Serve

    Once cooled, transfer it to an airtight container.

    Store in the refrigerator.

    Serve with rice, bibimbap, lettuce wraps, cabbage wraps, noodles, or Korean vegetable side dishes.


    Pro Tips

    Cook Out the Moisture Well

    This is the most important step.

    If too much moisture remains, the sauce may spoil faster and taste less concentrated.

    Cook slowly until the sauce becomes thick and slightly stiff.


    Use Low Heat After Adding Gochujang

    Gochujang can burn easily.

    After adding gochujang, reduce the heat and stir constantly.


    Break Up the Ground Beef

    Ground beef can clump together while cooking.

    Use a spoon or spatula to break it into small pieces so it mixes evenly into the sauce.


    Sizzle the Soy Sauce on the Pan Edge

    Adding soy sauce along the hot edge of the pan creates a deeper toasted soy sauce aroma.

    This small step makes the sauce taste richer.


    Cool Before Storing

    Do not close the lid while the sauce is still hot.

    Cool it completely first, then store it in the refrigerator.


    Use Clean Utensils

    Always use a clean spoon when taking bokkeum gochujang from the container.

    This helps it last longer.


    How to Use Bokkeum Gochujang

    Bokkeum Gochujang is very versatile.

    You can use it in many simple Korean meals:

    • Mix with warm rice and sesame oil
    • Add to bibimbap
    • Serve with lettuce wraps
    • Serve with steamed cabbage wraps
    • Add to rice bowls
    • Use as a topping for noodles
    • Serve with fried eggs
    • Pair with grilled meat
    • Add to vegetable side dishes
    • Use as a quick spicy sauce for lunch boxes

    For a simple meal, mix warm rice with bokkeum gochujang, sesame oil, sesame seeds, and a fried egg.


    What to Serve with Bokkeum Gochujang

    Bokkeum Gochujang pairs well with:

    • Steamed white rice
    • Fried egg
    • Bibimbap
    • Lettuce wraps
    • Steamed cabbage wraps
    • Tofu Ssamjang with Cabbage Wraps
    • Kkakdugi
    • Onion Geotjeori
    • Oi Muchim
    • Musaengchae
    • Kongnamul Guk
    • Miyeokguk
    • Bulgogi
    • Galbijjim
    • Samgyeopsal

    It is especially useful when you want a quick Korean meal without cooking many side dishes.


    Storage Tips

    Store bokkeum gochujang in an airtight container in the refrigerator.

    It is best eaten within about 3 weeks.

    Let the sauce cool completely before storing.

    Because this sauce contains beef and vegetables, always keep it refrigerated and use a clean spoon each time.

    If the sauce smells sour, looks moldy, or changes texture strangely, discard it.

    Freezing is possible, but the texture may change slightly after thawing. For best flavor, refrigerate and use within a few weeks.


    Frequently Asked Questions

    Can I use pork instead of beef?

    Yes.

    Ground pork can be used instead of ground beef.

    Pork gives the sauce a slightly richer and softer flavor.


    Can I make this without meat?

    Yes.

    You can skip the ground beef and add more onion, mushrooms, or finely chopped tofu.

    However, the flavor and storage time may be different.


    Is bokkeum gochujang very spicy?

    It depends on the gochujang you use.

    This sauce is spicy, savory, and slightly sweet, but not extremely spicy.

    For a milder version, use a mild gochujang and add a little more onion.


    Why is my sauce watery?

    The vegetables and meat may not have been cooked long enough.

    Continue stir-frying over low heat until the moisture evaporates and the sauce becomes thick.


    Why did my gochujang burn?

    The heat was probably too high after adding the gochujang.

    Gochujang burns easily, so use low heat and stir often.


    How long does bokkeum gochujang last?

    It can last about 2 to 3 weeks in the refrigerator if cooked down well and handled with clean utensils.

    Because it contains meat, do not leave it at room temperature.


    Can I use it for bibimbap?

    Yes.

    Bokkeum gochujang is excellent for bibimbap.

    It adds meat, spice, sweetness, and deep flavor in one spoonful.


    Can I reduce the sugar?

    Yes.

    You can reduce the sugar slightly if you prefer a less sweet sauce.

    However, sugar balances the saltiness and spiciness of the gochujang.


    Final Thoughts

    Bokkeum Gochujang is a practical and flavorful Korean stir-fried gochujang sauce that is perfect to keep in the refrigerator.

    With ground beef, gochujang, onion, green onion, garlic, sugar, soy sauce, and oil, this sauce becomes rich, spicy, savory, slightly sweet, and deeply satisfying.

    The key is to cook the vegetables and beef until the moisture evaporates, add the gochujang, then stir-fry slowly over low heat until the sauce becomes thick and concentrated.

    If you want an easy Korean sauce that can turn plain rice into a satisfying meal, this Bokkeum Gochujang recipe is an excellent choice.
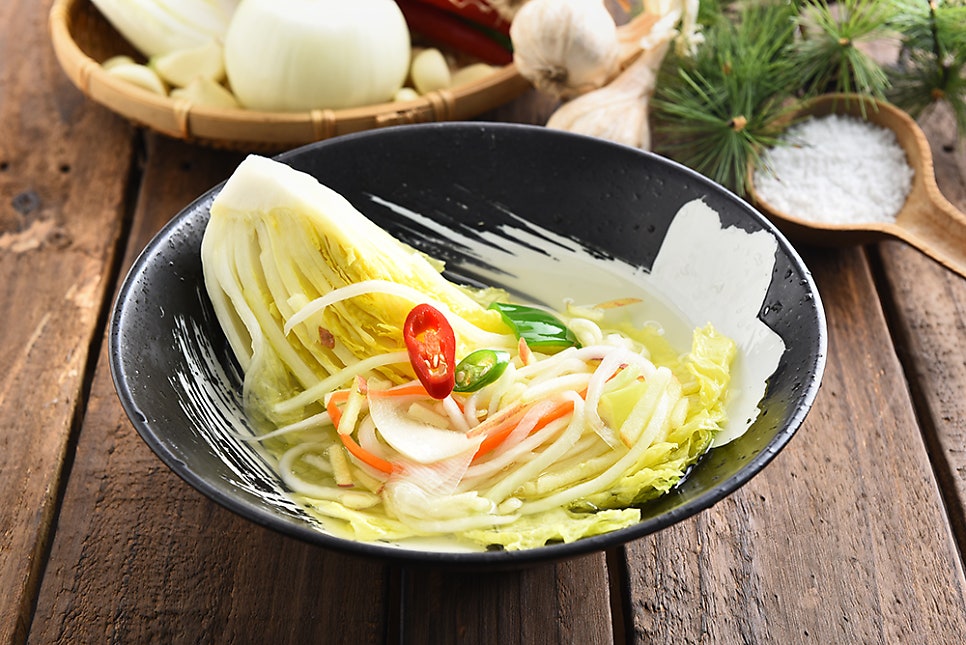
  • Baek Kimchi Recipe (Korean White Kimchi Without Fish Sauce)

    Baek Kimchi Recipe (Korean White Kimchi Without Fish Sauce)

    Baek Kimchi is a mild Korean white kimchi made with napa cabbage, Korean radish, carrot, green onion, red chili pepper, pear, onion, garlic, ginger, rice, and sea salt.

    Unlike spicy red kimchi, baek kimchi does not use gochugaru. This version is also made without fish sauce or salted seafood, giving it a clean, refreshing, lightly sweet, and crisp flavor.

    It takes some preparation, but the method is easier than it looks. Once the cabbage is salted and the vegetables are prepared, the seasoning broth comes together simply with blended rice, pear, onion, garlic, and ginger.


    What is Baek Kimchi?

    Baek Kimchi means Korean white kimchi.

    “Baek” means white, and “kimchi” refers to Korean fermented vegetables. Unlike regular napa cabbage kimchi, baek kimchi is not red or spicy. It is made with a clear, refreshing kimchi liquid and mild vegetable filling.

    This kimchi is crisp, cool, lightly sweet, and slightly tangy after fermentation. It is especially good for people who prefer mild kimchi or want a clean side dish without strong fish sauce flavor.

    Baek kimchi is often served with rice, Korean soups, grilled meat, braised dishes, and holiday meals.


    Recipe Information

    Prep Time: 1 hour

    Salting Time: 5 to 6 hours

    Fermentation Time: 1 to 2 days

    Total Time: 2 days, including fermentation

    Servings: 6 or more

    Difficulty: Easy to Moderate

    Cuisine: Korean

    Main Ingredient: Napa cabbage

    Best Served As: Korean side dish


    Ingredients

    Main Ingredients

    1 napa cabbage

    1/2 Korean radish

    10 stalks green onion or Korean chives

    1/2 carrot

    4 red chili peppers

    For Salting the Cabbage

    About 8 handfuls coarse sea salt

    Water, as needed

    For the Rice Base

    2/3 bowl cooked rice

    About 1 1/2 large bowls water

    For the White Kimchi Seasoning

    1 onion

    1 pear

    12 garlic cloves

    2 tbsp ginger syrup

    2 tbsp coarse sea salt

    Optional Substitute

    If you do not have ginger syrup, use a small piece of fresh ginger instead.


    Ingredient Notes

    Napa Cabbage

    Napa cabbage is the main ingredient of baek kimchi.

    Cut it into quarters and salt the thick stem parts well. Proper salting helps the cabbage soften, season evenly, and ferment better.


    Korean Radish

    Korean radish adds crunch and refreshing sweetness.

    Slice it into thin strips and salt it lightly before adding it to the filling.


    Carrot

    Carrot adds color and a gentle sweetness.

    Salt it briefly until it softens slightly.


    Green Onion or Korean Chives

    Green onion gives the kimchi a fresh aroma.

    You can also use Korean chives if available.


    Red Chili Pepper

    Red chili pepper adds color without making the kimchi too spicy.

    Remove the seeds before slicing for a cleaner and milder flavor.


    Cooked Rice

    Cooked rice helps create the kimchi liquid.

    It works like a simple rice paste and helps support fermentation.

    You can boil the rice with water first, or blend it directly if you want a simpler version.


    Pear

    Pear adds natural sweetness and a refreshing flavor.

    It also makes the kimchi liquid taste clean and bright.


    Onion

    Onion adds sweetness and depth to the seasoning liquid.

    It blends well with pear, garlic, and rice.


    Garlic

    Garlic gives the kimchi savory depth.

    Because this is a mild white kimchi, garlic should be balanced and not overpowering.


    Ginger Syrup

    Ginger syrup adds gentle warmth, sweetness, and aroma.

    If you do not have ginger syrup, use a small piece of fresh ginger instead.


    Coarse Sea Salt

    Sea salt is used for salting the cabbage and seasoning the kimchi liquid.

    Adjust the final salt level carefully because the salted cabbage already contains some salt.


    How to Make Baek Kimchi

    Step 1: Cut the Napa Cabbage

    Cut the top part of the napa cabbage with a knife, then gently split it in half by hand.

    Cut each half again to make 4 quarters.

    Splitting the cabbage by hand helps keep the leaves cleaner and less damaged.


    Step 2: Salt the Cabbage

    Sprinkle coarse sea salt between the thick cabbage leaves, especially near the stem parts.

    Place the cabbage in a large bowl or container.

    Add about one large bowl of water to help the salt spread.

    Let the cabbage salt for about 5 to 6 hours, or until the thick stems become flexible.

    Turn the cabbage once or twice during salting so it salts evenly.


    Step 3: Make the Rice Base

    Place 2/3 bowl of cooked rice and about 1 1/2 large bowls of water in a pot.

    Boil until the rice softens and the liquid becomes slightly cloudy and thick.

    Turn off the heat and let it cool.

    This rice base helps the kimchi liquid ferment and gives it a smoother flavor.

    If you want a simpler method, you can skip boiling and blend the cooked rice directly with the seasoning ingredients.


    Step 4: Salt the Radish and Carrot

    Julienne the Korean radish.

    Julienne the carrot.

    Lightly salt the radish and carrot until they soften slightly.

    They do not need to be fully wilted. A slightly flexible texture is enough.


    Step 5: Prepare the Red Chili Pepper and Green Onion

    Remove the seeds from the red chili peppers.

    Slice them into thin strips.

    Cut the green onions into bite-sized lengths.

    Set everything aside.


    Step 6: Blend the Seasoning Liquid

    In a blender, combine the cooled rice base with:

    • 1 onion
    • 1 pear
    • 12 garlic cloves
    • 2 tbsp ginger syrup

    Blend until smooth.

    If your blender is small, blend in batches.


    Step 7: Season the Kimchi Liquid

    Pour the blended mixture into a large bowl.

    Add 2 tablespoons of coarse sea salt.

    Stir well until the salt dissolves.

    Taste the liquid.

    It should be pleasantly seasoned but not overly salty, because the salted cabbage will also add saltiness.

    If it tastes bland, add a little more sea salt.

    If it needs more sweetness, blend in a little more pear rather than adding sugar.


    Step 8: Make the Filling

    In a large bowl, combine:

    • Salted radish
    • Salted carrot
    • Sliced red chili pepper
    • Green onion

    Add some of the blended seasoning liquid.

    Mix gently.

    This becomes the vegetable filling for the cabbage.


    Step 9: Rinse the Salted Cabbage

    When the cabbage is properly salted, rinse it 3 times under clean water.

    Drain well.

    The cabbage should be flexible but not mushy.

    Let it sit in a strainer for a while to remove excess water.


    Step 10: Fill the Cabbage

    Place some of the vegetable filling between the cabbage leaves.

    Focus on the thicker stem areas where the leaves overlap.

    Do not overfill the cabbage.

    A moderate amount of filling is enough for baek kimchi because the clear liquid is also important.


    Step 11: Pack into a Kimchi Container

    Place the filled cabbage quarters into a kimchi container.

    Pour the remaining seasoning liquid over the cabbage.

    Press down gently so the cabbage is covered by the liquid as much as possible.

    Cover the top with a clean disposable plastic sheet or wrap before closing the lid if desired.

    This helps keep the kimchi surface clean during fermentation.


    Step 12: Ferment at Room Temperature

    Leave the kimchi at room temperature for about 1 to 2 days.

    The exact time depends on the temperature of your kitchen.

    After about 2 days, open the container and check the flavor.

    When it tastes lightly tangy, sweet, and refreshing, move it to the refrigerator.


    Step 13: Serve

    Serve baek kimchi chilled.

    Cut the cabbage into bite-sized pieces before serving.

    Spoon a little of the refreshing kimchi liquid over the top.


    Pro Tips

    Salt the Cabbage Properly

    The cabbage should become flexible but not too soft.

    If the thick stem bends without snapping, it is ready.


    Focus Salt on the Thick Stem Parts

    The leafy parts salt quickly, but the thick white stem parts need more salt.

    Sprinkle salt mainly near the stem area for even salting.


    Rinse the Cabbage Well

    Rinse the salted cabbage about 3 times.

    This removes excess salt and keeps the final flavor clean.


    Let the Cabbage Drain

    Too much water on the cabbage can dilute the kimchi liquid.

    Drain it well before adding the filling.


    Use Pear for Natural Sweetness

    Pear gives baek kimchi a clean, refreshing sweetness.

    If the kimchi liquid needs more sweetness, add more pear instead of sugar.


    Do Not Make It Too Salty

    The cabbage is already salted, so the seasoning liquid should not be overly salty.

    Taste carefully before packing the kimchi.


    Ferment Slowly for Better Flavor

    Baek kimchi tastes best when it ferments gently.

    After 1 to 2 days at room temperature, move it to the refrigerator and let the flavor continue developing slowly.


    What to Serve with Baek Kimchi

    Baek Kimchi pairs well with:

    • Steamed white rice
    • Galbijjim
    • Bulgogi
    • Samgyeopsal
    • Soy Sauce Braised Pork Back Ribs
    • Spicy Galbijjim
    • Tofu Ssamjang with Cabbage Wraps
    • Kongnamul Guk
    • Miyeokguk
    • Doenjang Jjigae
    • Kalguksu
    • Japchae
    • Gyeran Jjim

    It is especially good with rich meat dishes because the clean and refreshing flavor balances heavy foods.


    Storage Tips

    Store baek kimchi in an airtight kimchi container in the refrigerator.

    After the first room-temperature fermentation, keep it chilled.

    It is best eaten within 2 to 3 weeks for a crisp and refreshing texture.

    Always use clean utensils when taking kimchi from the container.

    As it ferments, the flavor becomes more tangy and deeper.

    Keep the cabbage covered with the kimchi liquid as much as possible to prevent drying.

    Freezing is not recommended because the cabbage texture will become soft and watery after thawing.


    Frequently Asked Questions

    Is baek kimchi spicy?

    No.

    Baek kimchi is a mild white kimchi that does not use gochugaru.

    Red chili pepper is used mostly for color and a light fresh aroma.


    Can I make baek kimchi without fish sauce?

    Yes.

    This recipe is made without fish sauce or salted seafood.

    It has a clean, mild, and refreshing flavor.


    How long should I salt the cabbage?

    Usually about 5 to 6 hours is enough, depending on the size and thickness of the cabbage.

    The thick stem should become bendable.


    Can I skip boiling the rice?

    Yes.

    You can blend cooked rice directly with the seasoning ingredients.

    Boiling the rice first can make the mixture smoother and feel a little cleaner, but it is not required.


    What can I use instead of ginger syrup?

    Use a small piece of fresh ginger.

    Blend it with the rice, pear, onion, and garlic.


    Can I add sugar?

    You can, but pear is better for baek kimchi.

    Pear gives a more natural and refreshing sweetness.


    How long should baek kimchi ferment?

    Leave it at room temperature for about 1 to 2 days.

    When it becomes lightly tangy, move it to the refrigerator.


    Why is my baek kimchi too salty?

    The cabbage may have been salted too heavily or not rinsed enough.

    You can add a little cold water to the kimchi liquid to dilute the saltiness.


    Why is my baek kimchi bland?

    The seasoning liquid may need more salt, or the cabbage may not have been salted enough.

    Add a little sea salt to the liquid and let it rest longer in the refrigerator.


    Final Thoughts

    Baek Kimchi is a clean, mild, and refreshing Korean white kimchi that can be made at home without fish sauce.

    With napa cabbage, radish, carrot, green onion, red chili pepper, pear, onion, garlic, ginger, rice, and sea salt, this kimchi becomes crisp, lightly sweet, tangy, and cooling after fermentation.

    The preparation may look detailed at first, but the process is simple when divided into steps: salt the cabbage, prepare the vegetables, blend the seasoning liquid, fill the cabbage, and ferment.

    If you want a mild Korean kimchi that is refreshing, clean-tasting, and perfect with rice or rich Korean dishes, this Baek Kimchi recipe is an excellent choice.
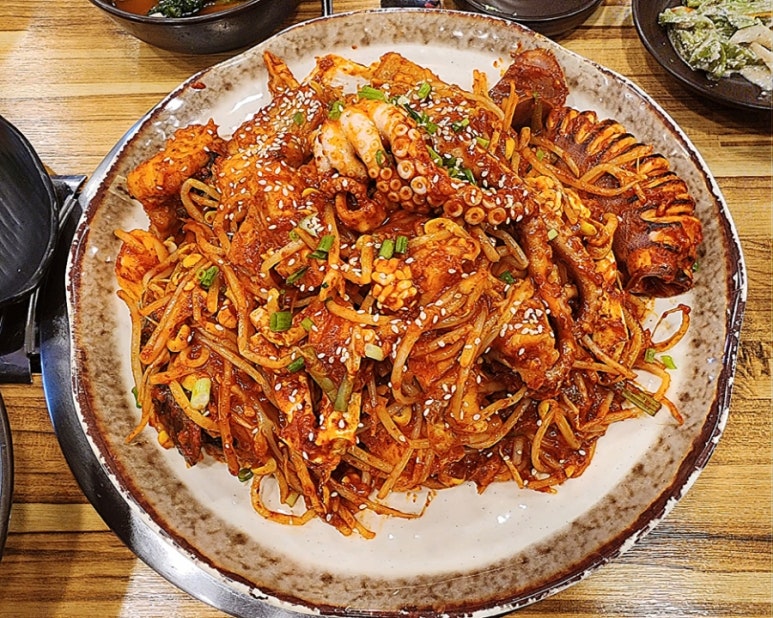
  • Onion Geotjeori Recipe(Korean Fresh Onion Kimchi Salad)

    Onion Geotjeori Recipe(Korean Fresh Onion Kimchi Salad)

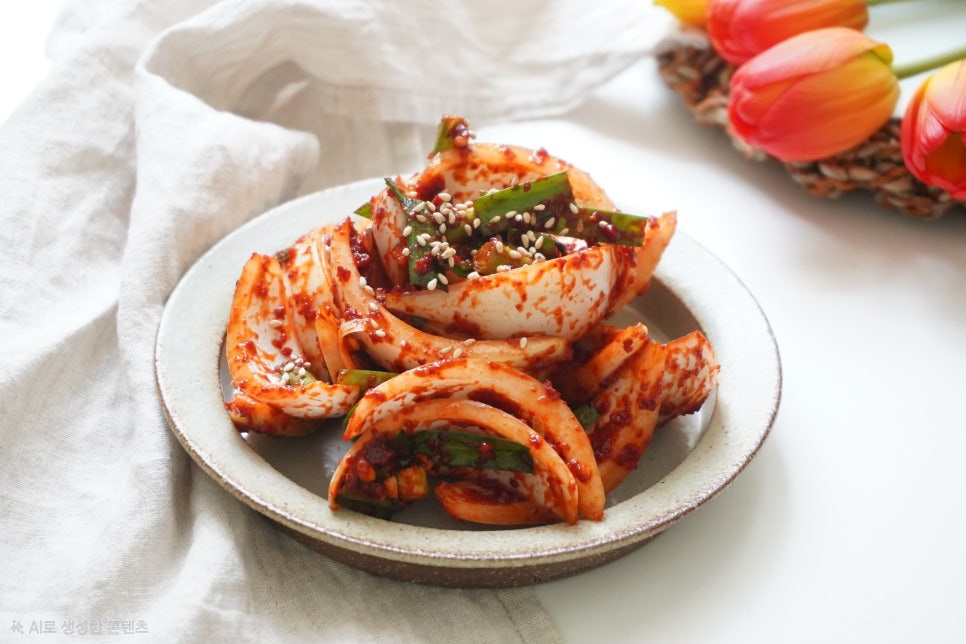
    Onion Geotjeori is a quick Korean fresh onion salad made with thick-sliced onions, fish sauce, gochugaru, garlic, sugar, plum extract, and sesame seeds.

    This recipe is simple, refreshing, lightly spicy, and perfect as a side dish for rich or greasy foods. The onions are briefly soaked in salt water, seasoned with anchovy fish sauce, then mixed with a spicy-sweet Korean seasoning.

    Unlike fully fermented kimchi, geotjeori is meant to be eaten fresh. After resting in the refrigerator for a few hours, the onion becomes slightly softened, crisp, and deeply flavorful.


    What is Onion Geotjeori?

    Onion Geotjeori is a Korean fresh-style onion kimchi salad.

    “Geotjeori” refers to a fresh, lightly seasoned Korean kimchi-style side dish that is usually eaten without long fermentation.

    This onion version is especially good with grilled meat, fried foods, Korean BBQ, pork dishes, and rich stews because the sharp and refreshing onion flavor helps balance heavy meals.

    The flavor is spicy, savory, slightly sweet, and clean.


    Recipe Information

    Prep Time: 20 minutes

    Resting Time: 10 minutes

    Total Time: 30 minutes

    Servings: 2

    Difficulty: Easy

    Cuisine: Korean

    Main Ingredient: Onion

    Best Served As: Korean side dish


    Ingredients

    Main Ingredients

    2 onions

    Sesame seeds, to taste

    For Soaking the Onions

    Water, enough to cover the onions

    1 tsp salt

    For Seasoning the Onions

    4 tbsp anchovy fish sauce

    Spicy Seasoning

    2 to 3 tbsp gochugaru

    1 tsp minced garlic

    1 tbsp sugar

    1 tbsp plum extract

    Optional Final Seasoning

    A pinch of salt, if needed


    Ingredient Notes

    Onion

    Use fresh onions for the best flavor and texture.

    Slice them thickly so they stay crisp after soaking and seasoning.

    If the onions are too thin, they may become too soft and watery.


    Salt Water

    Soaking the onions briefly in light salt water helps reduce the harsh raw onion bite.

    It also lightly seasons the onions before adding the fish sauce.


    Anchovy Fish Sauce

    Anchovy fish sauce gives the dish a deep savory flavor.

    It also draws moisture from the onions, which becomes part of the seasoning base.


    Gochugaru

    Gochugaru gives the onion geotjeori its red color and spicy flavor.

    Use Korean red pepper flakes for the best taste.

    Use 2 tablespoons for a milder version and 3 tablespoons for a stronger spicy flavor.


    Minced Garlic

    Garlic adds sharpness and depth.

    A small amount is enough because raw onion already has a strong flavor.


    Sugar

    Sugar balances the sharpness of the onion and the saltiness of the fish sauce.

    It also helps the seasoning taste smoother.


    Plum Extract

    Plum extract adds gentle sweetness and fruity acidity.

    It makes the seasoning taste cleaner and more balanced.


    Sesame Seeds

    Sesame seeds add a nutty finish.

    Sprinkle them at the end for better texture and appearance.


    How to Make Onion Geotjeori

    Step 1: Prepare the Onions

    Peel 2 onions.

    Cut each onion in half.

    Slice the onions into thick pieces.

    Do not slice them too thinly because the onions should keep some crunch.


    Step 2: Soak the Onions in Salt Water

    Place the sliced onions in a bowl.

    Add 1 teaspoon of salt.

    Pour in enough water to cover the onions.

    Let them soak for about 10 minutes.

    This helps soften the sharp raw onion flavor.


    Step 3: Drain the Onions

    Drain the onions in a strainer.

    Let them sit briefly to remove excess water.

    Do not squeeze them too hard because the onion texture should stay crisp.


    Step 4: Season with Fish Sauce

    Place the drained onions in a mixing bowl.

    Add 4 tablespoons of anchovy fish sauce.

    Toss gently until the onions are evenly coated.

    Let the onions rest for about 10 minutes.

    During this time, the onions will release moisture and mix with the fish sauce.


    Step 5: Separate the Onion Liquid

    After 10 minutes, move the onions to another plate or bowl.

    Do not throw away the liquid left in the bottom of the bowl.

    This liquid contains onion juice and fish sauce, and it will be used to make the seasoning.


    Step 6: Make the Spicy Seasoning

    To the onion liquid, add:

    • 2 to 3 tbsp gochugaru
    • 1 tsp minced garlic
    • 1 tbsp sugar
    • 1 tbsp plum extract

    Mix well.

    Let the mixture sit briefly so the gochugaru can absorb the liquid and bloom.

    This makes the seasoning color deeper and the texture smoother.


    Step 7: Mix the Onions with the Seasoning

    Add the onions back into the bowl with the seasoning.

    Toss gently until every onion piece is coated.

    Be careful not to crush the onions.


    Step 8: Adjust the Seasoning

    Taste the onion geotjeori.

    If it tastes bland, add a small pinch of salt.

    If you want it spicier, add a little more gochugaru.

    If you want it sweeter, add a small amount of sugar or plum extract.


    Step 9: Finish with Sesame Seeds

    Sprinkle sesame seeds over the top.

    Mix lightly or leave them on top as garnish.


    Step 10: Serve

    You can serve onion geotjeori right away.

    For a better flavor, refrigerate it for about half a day before serving.

    After resting, the onions become more flavorful and the seasoning tastes more balanced.


    Pro Tips

    Slice the Onions Thickly

    Thick onion slices keep a better crunch.

    Thin slices can become too soft after soaking and seasoning.


    Do Not Throw Away the Fish Sauce Liquid

    The liquid from the onions and fish sauce becomes the base of the seasoning.

    It gives the dish a deeper onion flavor and helps the gochugaru bloom.


    Let the Gochugaru Bloom

    After mixing gochugaru with the onion liquid, let it sit briefly.

    This gives the seasoning a smoother texture and deeper red color.


    Rest Before Eating

    Onion geotjeori can be eaten right away, but it tastes better after resting in the refrigerator.

    After a few hours, the sharp onion flavor becomes milder and more balanced.


    Adjust Salt at the End

    Fish sauce already contains salt.

    Taste the finished dish before adding extra salt.


    What to Serve with Onion Geotjeori

    Onion Geotjeori pairs well with:

    • Samgyeopsal
    • Korean BBQ
    • Bulgogi
    • Galbijjim
    • Spicy Galbijjim
    • Soy Sauce Braised Pork Back Ribs
    • Tofu Ssamjang with Cabbage Wraps
    • Steamed white rice
    • Kimchi Jjigae
    • Doenjang Jjigae
    • Gyeran Jjim
    • Fried foods
    • Grilled fish

    It is especially good with rich or oily dishes because the fresh onion flavor cuts through heaviness.


    Storage Tips

    Store onion geotjeori in an airtight container in the refrigerator.

    It is best eaten within 2 to 3 days.

    The onions will release more liquid as they sit, and the flavor will become stronger.

    For the best texture, eat it while the onions are still crisp.

    Freezing is not recommended because the onions will become watery and soft after thawing.


    Frequently Asked Questions

    Can I eat onion geotjeori right away?

    Yes.

    You can eat it right after mixing, but it tastes better after resting in the refrigerator for a few hours.


    Why soak the onions in salt water?

    Salt water helps reduce the strong raw onion bite.

    It also lightly seasons the onions and improves the texture.


    Can I use regular fish sauce instead of anchovy fish sauce?

    Yes.

    Korean anchovy fish sauce is best, but another fish sauce can be used.

    The flavor may be slightly different.


    Can I make this without plum extract?

    Yes.

    You can replace plum extract with a little more sugar, corn syrup, or Korean cooking syrup.

    Plum extract gives a cleaner sweet-sour flavor, but the recipe still works without it.


    Is this the same as kimchi?

    It is kimchi-style, but it is not a long-fermented kimchi.

    It is a fresh geotjeori side dish meant to be eaten within a few days.


    Can I make it less spicy?

    Yes.

    Use 2 tablespoons of gochugaru instead of 3 tablespoons.

    You can also reduce the garlic slightly for a milder flavor.


    Why is my onion geotjeori watery?

    Onions naturally release liquid after seasoning.

    This is normal.

    If there is too much liquid, mix before serving and use a slotted spoon if needed.


    What kind of onion should I use?

    Regular yellow onions work well.

    Sweet onions can also be used for a milder and sweeter version.


    Final Thoughts

    Onion Geotjeori is a quick and refreshing Korean onion side dish that is perfect with rich, greasy, or grilled foods.

    With onions, anchovy fish sauce, gochugaru, garlic, sugar, plum extract, and sesame seeds, you can make a simple Korean fresh kimchi-style salad in about 30 minutes.

    The key is to slice the onions thickly, soak them briefly in salt water, season them with fish sauce, and use the onion liquid to bloom the gochugaru seasoning.

    If you want an easy Korean side dish that is spicy, crisp, savory, and refreshing, this Onion Geotjeori recipe is an excellent choice.

  • Tofu Ssamjang with Cabbage Wraps Recipe (Korean Tofu Dipping Sauce for Steamed Cabbage)

    Tofu Ssamjang with Cabbage Wraps Recipe (Korean Tofu Dipping Sauce for Steamed Cabbage)

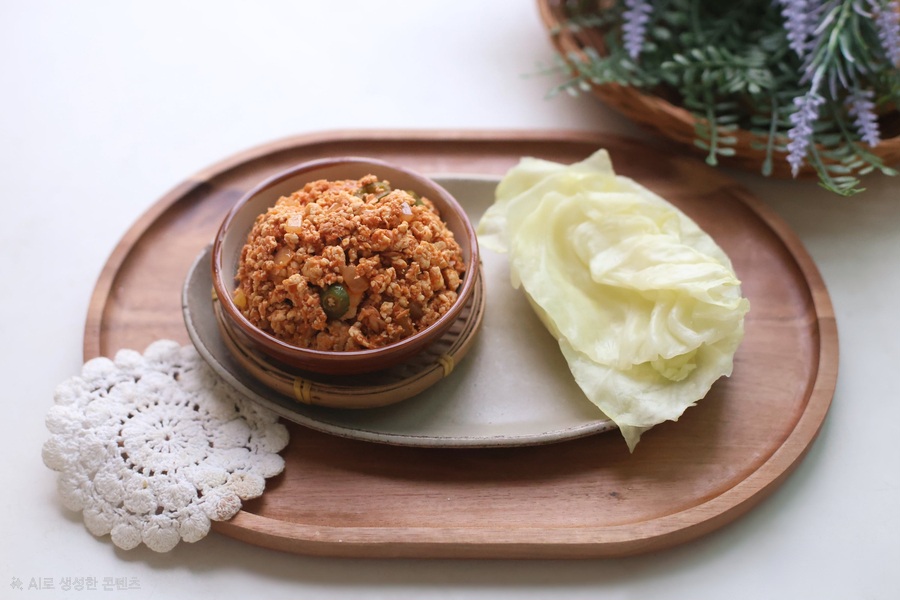
    Tofu Ssamjang with Cabbage Wraps is a simple Korean home-style dish made with tofu, zucchini, onion, doenjang, gochujang, ssamjang, perilla oil, and tender steamed or boiled cabbage leaves.

    This recipe is savory, nutty, hearty, and easy to make. The tofu ssamjang works like a thick Korean dipping sauce, while the cabbage leaves are used as soft wraps for rice and sauce.

    When you do not want to prepare many side dishes, this dish is an excellent option. With warm rice, tender cabbage, and rich tofu ssamjang, you can make a satisfying Korean meal with only a few ingredients.


    What is Tofu Ssamjang with Cabbage Wraps?

    Tofu Ssamjang is a Korean dipping sauce made by cooking tofu with Korean soybean paste, chili paste, vegetables, and oil.

    “Ssamjang” is a Korean wrap sauce usually served with lettuce wraps, cabbage wraps, grilled meat, and rice. This version adds tofu, zucchini, and onion, making it softer, more filling, and more suitable as a light meal.

    The cabbage leaves are boiled or steamed until tender, then served with rice and tofu ssamjang. To eat, place rice on a cabbage leaf, add a spoonful of tofu ssamjang, wrap it, and enjoy it in one bite.


    Recipe Information

    Prep Time: 10 minutes

    Cook Time: 20 minutes

    Total Time: 30 minutes

    Servings: 4

    Difficulty: Easy

    Cuisine: Korean

    Main Ingredient: Tofu and cabbage

    Best Served As: Korean side dish or light meal


    Ingredients

    For the Tofu Ssamjang

    1/3 zucchini

    1/2 onion

    1/2 block tofu

    1 cup water

    Seasoning

    2 tbsp doenjang

    1 tbsp gochujang

    1/2 tbsp ssamjang

    1 tbsp perilla oil

    For the Cabbage Wraps

    1/2 cabbage

    Water, as needed

    A pinch of salt, optional


    Ingredient Notes

    Tofu

    Tofu makes the ssamjang thick, soft, and filling.

    Firm tofu works best if you want some texture. Soft tofu can also be used if you prefer a smoother sauce.

    Crush the tofu while cooking so it blends into the sauce and absorbs the seasoning.


    Cabbage

    Cabbage becomes sweet and tender when boiled or steamed.

    It works well as a Korean wrap because the leaves are soft enough to fold around rice and sauce.

    Do not overcook the cabbage. It should be tender, but not mushy.


    Zucchini

    Zucchini adds mild sweetness and a soft texture.

    Chop it finely so it cooks quickly and blends well into the tofu ssamjang.


    Onion

    Onion adds natural sweetness and depth.

    Cook it until translucent before adding the sauce ingredients.


    Doenjang

    Doenjang is Korean fermented soybean paste.

    It gives the tofu ssamjang a deep, savory, earthy flavor.


    Gochujang

    Gochujang adds mild heat, color, and a slightly sweet flavor.

    It balances the salty and rich flavor of the doenjang.


    Ssamjang

    Ssamjang adds a ready-made Korean wrap sauce flavor.

    Only a small amount is needed because doenjang and gochujang already provide strong flavor.


    Perilla Oil

    Perilla oil gives this dish a deep nutty aroma.

    It works especially well with tofu, doenjang, and cabbage.

    If you do not have perilla oil, sesame oil can be used, but the flavor will be slightly different.


    How to Make Tofu Ssamjang with Cabbage Wraps

    Step 1: Prepare the Vegetables

    Finely chop the zucchini.

    Finely chop the onion.

    Small pieces are better because this recipe is served as a dipping sauce for cabbage wraps.


    Step 2: Stir-Fry the Vegetables

    Place a pan over medium heat.

    Add 1 tablespoon of perilla oil.

    Add the chopped zucchini and onion.

    Stir-fry until the onion becomes slightly translucent.

    This step brings out the natural sweetness of the vegetables and gives the sauce a deeper flavor.


    Step 3: Add Water

    Pour in 1 cup of water.

    Stir gently.

    The water helps dissolve the Korean pastes and creates the base of the sauce.


    Step 4: Add the Seasonings

    Add:

    • 2 tbsp doenjang
    • 1 tbsp gochujang
    • 1/2 tbsp ssamjang

    Stir well until the pastes dissolve into the water.


    Step 5: Add the Tofu

    Add 1/2 block of tofu to the pan.

    Use a spoon or spatula to crush the tofu while stirring.

    The tofu should break into small pieces and mix evenly into the sauce.


    Step 6: Simmer the Tofu Ssamjang

    Let the sauce simmer over medium heat.

    Stir occasionally so it does not stick to the bottom of the pan.

    Cook until the liquid reduces and the sauce becomes thick but still moist.

    The final texture should be soft, chunky, and spoonable.


    Step 7: Prepare the Cabbage

    Remove any damaged outer leaves from the cabbage.

    Cut the cabbage into large pieces, or separate the leaves one by one.

    Rinse the cabbage well under running water.


    Step 8: Boil the Cabbage

    Bring a pot of water to a boil.

    Add a pinch of salt if desired.

    Add the cabbage leaves.

    Boil for about 4 to 6 minutes, or until the leaves become tender but still slightly firm.

    If the cabbage leaves are very thick, cook them a little longer.


    Step 9: Drain the Cabbage

    Remove the cabbage from the pot.

    Drain well in a strainer.

    Let it cool slightly before serving.

    If the cabbage leaves hold too much water, gently press out the excess moisture.


    Step 10: Serve

    Serve the boiled cabbage leaves with warm rice and tofu ssamjang.

    To eat, place a spoonful of rice on a cabbage leaf.

    Add tofu ssamjang on top.

    Wrap it and enjoy in one bite.


    Pro Tips

    Chop the Vegetables Finely

    Finely chopped zucchini and onion blend better into the sauce.

    This makes the tofu ssamjang easier to spoon into cabbage wraps.


    Cook the Onion Until Translucent

    Do not rush the first stir-fry step.

    Cooking the onion first brings out natural sweetness and balances the salty soybean paste.


    Crush the Tofu While Cooking

    Crushing the tofu in the pan helps it absorb the seasoning.

    It also gives the sauce a hearty texture.


    Do Not Make the Sauce Too Dry

    Tofu ssamjang should be thick but still moist.

    If it becomes too dry, add a small splash of water and stir again.


    Do Not Overcook the Cabbage

    The cabbage should be soft enough to wrap, but not mushy.

    Boil it just until tender so it keeps a pleasant texture.


    Drain the Cabbage Well

    Watery cabbage can make the wraps taste bland.

    After boiling, drain the cabbage well before serving.


    Taste Before Serving

    Doenjang and ssamjang can vary in saltiness by brand.

    Taste the sauce near the end and add a little water if it tastes too salty.


    What to Serve with Tofu Ssamjang and Cabbage Wraps

    Tofu Ssamjang with Cabbage Wraps pairs well with:

    • Steamed white rice
    • Kimchi
    • Kkakdugi
    • Oi Muchim
    • Musaengchae
    • Kongnamul Guk
    • Miyeokguk
    • Gyeran Jjim
    • Dubu Jorim
    • Bulgogi
    • Samgyeopsal
    • Galbijjim
    • Korean BBQ

    This dish can be served as a side dish, but it is also filling enough for a simple Korean meal.


    Storage Tips

    Store leftover tofu ssamjang and boiled cabbage separately.

    Keep tofu ssamjang in an airtight container in the refrigerator and eat it within 2 to 3 days.

    Keep boiled cabbage in a separate airtight container and eat it within 2 days.

    To reheat tofu ssamjang, warm it gently in a small pan over low heat or microwave it briefly.

    If the sauce becomes too thick after refrigeration, add a small splash of water and stir before reheating.

    Freezing is not recommended because tofu and cabbage can become watery after thawing.


    Frequently Asked Questions

    Can I steam the cabbage instead of boiling it?

    Yes.

    You can steam the cabbage for about 7 to 10 minutes, or until tender.

    Steaming helps the cabbage keep more sweetness and texture.


    Can I use sesame oil instead of perilla oil?

    Yes.

    Sesame oil can be used if you do not have perilla oil.

    However, perilla oil gives a deeper nutty flavor that works especially well with tofu and doenjang.


    Can I make this less salty?

    Yes.

    Use slightly less doenjang or add more tofu and vegetables.

    You can also add a little more water if the sauce tastes too salty.


    Can I make this spicy?

    Yes.

    Add more gochujang or a little gochugaru.

    For extra heat, add chopped Cheongyang chili pepper.


    What kind of tofu should I use?

    Firm tofu works best because it gives the sauce more texture.

    Soft tofu can also be used if you prefer a smoother sauce.


    Can I eat this without cabbage?

    Yes.

    Tofu ssamjang can be served with lettuce, perilla leaves, cucumber, carrots, or simply with rice.


    Is this a side dish or a sauce?

    It can be both.

    It works as a dipping sauce for wraps, but because it contains tofu and vegetables, it can also be eaten like a hearty Korean side dish.


    Can I make this ahead of time?

    Yes.

    You can make the tofu ssamjang ahead and store it in the refrigerator.

    Boil the cabbage on the day you plan to serve it for the best texture.


    Final Thoughts

    Tofu Ssamjang with Cabbage Wraps is a simple, hearty, and satisfying Korean dish made with tofu, zucchini, onion, doenjang, gochujang, ssamjang, perilla oil, and tender boiled cabbage.

    The tofu ssamjang is savory, nutty, and rich, while the cabbage leaves are soft, sweet, and perfect for wrapping rice. Together, they make an easy Korean meal that does not require many side dishes.

    The key is to cook the vegetables in perilla oil, simmer the tofu ssamjang until thick and spoonable, and boil the cabbage just until tender.

    If you want an easy Korean side dish or light meal that is healthy, comforting, and full of flavor, this Tofu Ssamjang with Cabbage Wraps recipe is an excellent choice.
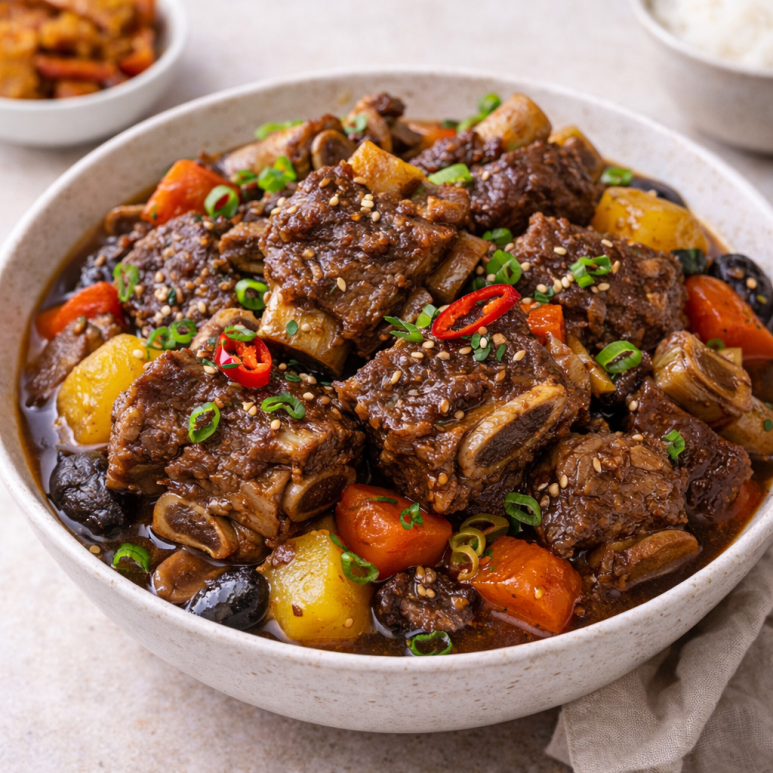
  • Kkakdugi Recipe (Korean Radish Kimchi)

    Kkakdugi Recipe (Korean Radish Kimchi)

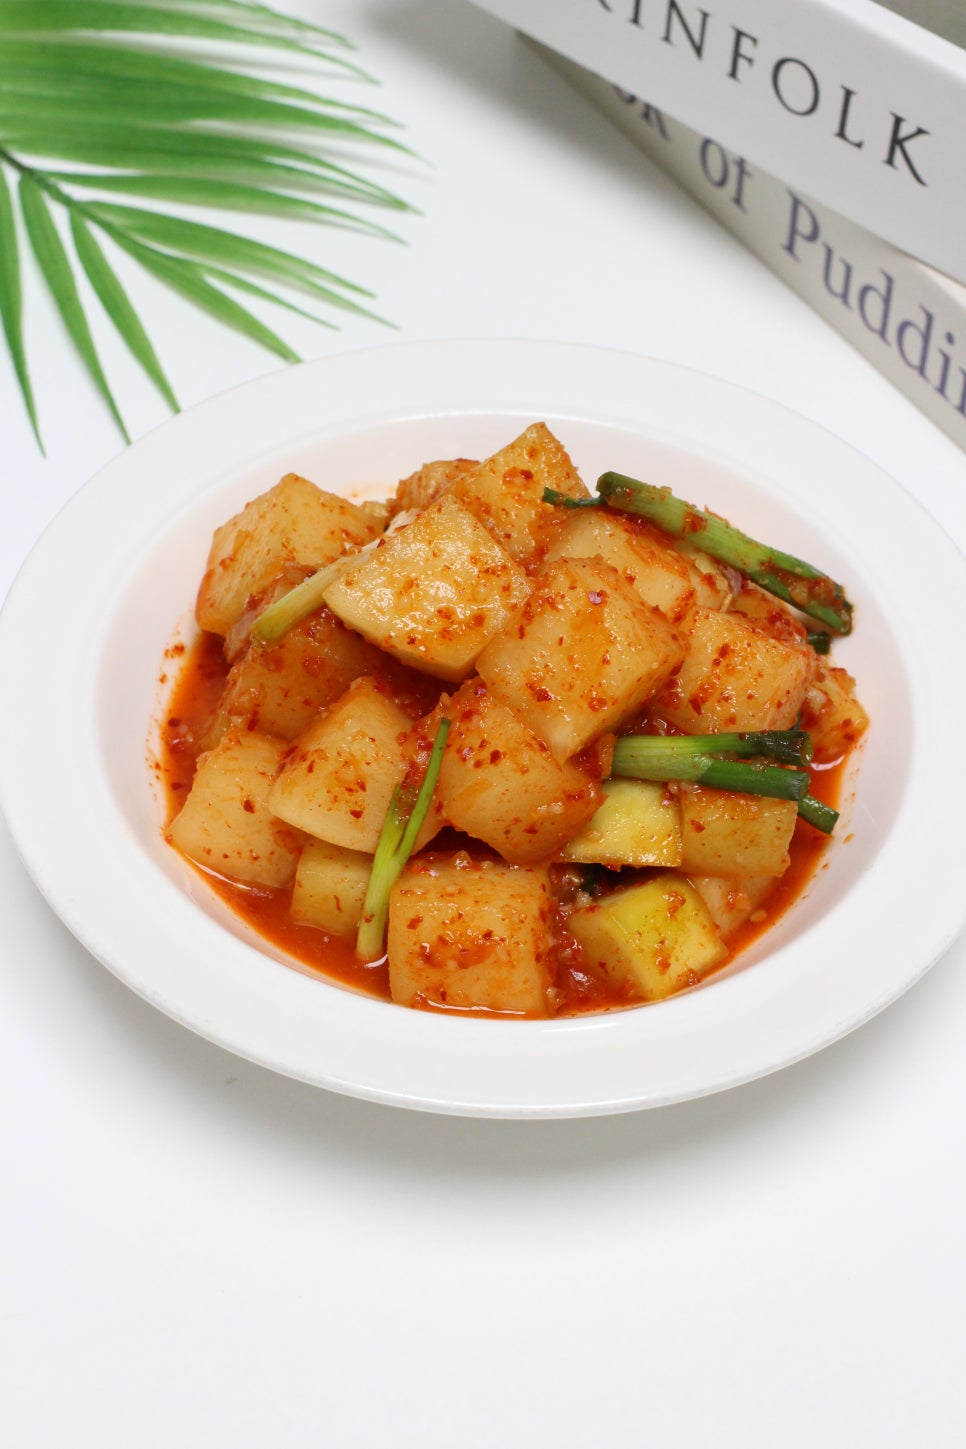
    Kkakdugi is a crunchy Korean radish kimchi made with cubed Korean radish, gochugaru, fish sauce, salted shrimp, garlic, green onion, onion, and a simple rice-based seasoning paste.

    This recipe is easy to make at home and does not require a separate flour paste. Instead, cold cooked rice is blended into the seasoning, which helps the sauce stick to the radish and supports fermentation.

    Kkakdugi is refreshing, spicy, savory, slightly sweet, and perfect with Korean soups, stews, rice dishes, noodles, and grilled meat.


    What is Kkakdugi?

    Kkakdugi is a traditional Korean cubed radish kimchi.

    Unlike napa cabbage kimchi, kkakdugi is made with Korean radish cut into bite-sized cubes. The radish is salted first, then mixed with a red kimchi seasoning made from gochugaru, fish sauce, salted shrimp, garlic, green onion, onion, and a small amount of rice.

    Fresh kkakdugi tastes crisp and lightly spicy. After fermentation, it becomes tangy, deeper, and more flavorful.

    It is one of the most common Korean side dishes and is especially popular with soups like seolleongtang, galbitang, kalguksu, and Korean stews.


    Recipe Information

    Prep Time: 20 minutes

    Salting Time: 30 minutes

    Total Time: 50 to 60 minutes

    Servings: 6 or more

    Difficulty: Easy

    Cuisine: Korean

    Main Ingredient: Korean radish

    Best Served As: Korean side dish


    Ingredients

    Main Ingredients

    2 Korean radishes

    4 tbsp coarse salt, divided

    Seasoning Base

    2 tbsp cold cooked rice

    1/2 onion

    3 tbsp salted shrimp

    6 tbsp kanari fish sauce

    2 to 3 tbsp allulose

    Additional Seasoning

    Gochugaru, to taste

    Minced garlic, to taste

    Chopped green onion, to taste

    Extra coarse salt, if needed


    Ingredient Notes

    Korean Radish

    Korean radish is the best choice for kkakdugi because it is firm, juicy, and naturally sweet.

    When salted and fermented, it stays crunchy and absorbs the kimchi seasoning well.

    Cut the radish into bite-sized cubes so it is easy to eat with rice, soup, or noodles.


    Coarse Salt

    Coarse salt is used to salt the radish before mixing it with the seasoning.

    This step helps draw out excess moisture, seasons the radish, and keeps the texture crisp.

    Use 3 tablespoons first for salting, then use the remaining salt only if the final seasoning tastes too bland.


    Cold Cooked Rice

    Cold cooked rice replaces traditional flour paste in this recipe.

    It helps the seasoning become slightly thick and stick to the radish. It also helps fermentation.

    Blend the rice well with the liquid ingredients. Even if a few small rice grains remain, they will soften and disappear as the kkakdugi ferments.


    Onion

    Onion adds natural sweetness and depth to the kimchi seasoning.

    Blending it into the sauce makes the seasoning smoother and more flavorful.


    Salted Shrimp

    Salted shrimp gives kkakdugi its deep savory flavor.

    It is one of the key ingredients in many Korean kimchi recipes.


    Kanari Fish Sauce

    Kanari fish sauce adds saltiness and umami.

    It helps season the radish and gives the kimchi a more authentic fermented flavor.


    Allulose

    Allulose adds gentle sweetness without making the kimchi too heavy.

    You can adjust the amount depending on how sweet the radish is.

    If you do not have allulose, you can use sugar, plum extract, or Korean cooking syrup.


    Gochugaru

    Gochugaru gives kkakdugi its red color and mild spicy flavor.

    Use Korean red pepper flakes for the best taste and appearance.


    How to Make Kkakdugi

    Step 1: Cut the Radish

    Wash the Korean radishes well.

    Peel them if needed.

    Cut the radish into bite-sized cubes.

    Try to keep the pieces similar in size so they salt and ferment evenly.


    Step 2: Salt the Radish

    Place the cubed radish in a large mixing bowl.

    Add 3 tablespoons of coarse salt.

    Gently toss until the radish pieces are evenly coated with salt.

    Let the radish sit for 30 minutes.


    Step 3: Toss Halfway Through

    After 15 minutes, toss the radish again.

    This helps the radish salt evenly on all sides.

    The radish will begin to release moisture and become slightly flexible while still staying crunchy.


    Step 4: Make the Rice-Based Seasoning

    While the radish is salting, prepare the seasoning base.

    In a blender, add:

    • 1/2 onion
    • 6 tbsp kanari fish sauce
    • 3 tbsp salted shrimp
    • 2 tbsp cold cooked rice
    • 2 tbsp allulose

    Blend until mostly smooth.

    Blend a little longer than usual so the cooked rice breaks down well.


    Step 5: Add Gochugaru, Garlic, and Green Onion

    Pour the blended seasoning into a mixing bowl.

    Add gochugaru, minced garlic, and chopped green onion.

    Mix well.

    Taste the seasoning and adjust if needed.

    If you want a sweeter flavor, add a little more allulose. If you want a stronger red color, add more gochugaru.


    Step 6: Mix the Radish with the Seasoning

    Add the seasoning to the salted radish.

    Mix gently until every radish cube is evenly coated.

    Taste one piece of radish.

    If it tastes too bland, add a small amount of coarse salt.

    The flavor should be slightly salty at this stage because kkakdugi becomes more balanced after fermentation.


    Step 7: Pack into a Container

    Transfer the seasoned radish into an airtight kimchi container.

    Press down gently to remove large air gaps.

    Do not fill the container all the way to the top, because kkakdugi can release liquid as it ferments.


    Step 8: Ferment the Kkakdugi

    Leave the kkakdugi at room temperature for about 1 day.

    The exact time depends on your kitchen temperature.

    When it starts to smell slightly tangy and releases more liquid, move it to the refrigerator.

    For a fresher and crunchier taste, refrigerate it sooner.

    For a more sour and fermented taste, leave it at room temperature a little longer.


    Step 9: Serve

    Serve chilled as a Korean side dish.

    Kkakdugi is especially delicious with hot rice, Korean soups, stews, noodles, and grilled meat.


    Pro Tips

    Use Fresh Korean Radish

    Fresh radish gives the best crunch and natural sweetness.

    If the radish tastes sweet and juicy before seasoning, the finished kkakdugi will taste better.


    Do Not Skip the Salting Step

    Salting is important because it seasons the radish and helps the texture stay crunchy.

    It also allows the kimchi seasoning to absorb better.


    Use Cold Rice Instead of Flour Paste

    This shortcut makes the recipe easier.

    You do not need to cook a separate flour paste. Cold cooked rice works well when blended with fish sauce, salted shrimp, and onion.


    Blend the Rice Well

    The rice should be blended until mostly smooth.

    Small pieces are fine because they will soften during fermentation.


    Season It Slightly Salty

    Freshly mixed kkakdugi should taste a little salty.

    As it ferments, the flavor becomes more balanced and delicious.


    Adjust Sweetness Carefully

    Radish sweetness changes by season.

    Taste the seasoning before mixing and add more allulose only if needed.


    What to Serve with Kkakdugi

    Kkakdugi pairs well with:

    • Steamed white rice
    • Seolleongtang
    • Galbitang
    • Kalguksu
    • Ramyeon
    • Kimchi Jjigae
    • Doenjang Jjigae
    • Kongnamul Guk
    • Miyeokguk
    • Galbijjim
    • Bulgogi
    • Samgyeopsal
    • Korean BBQ

    It is especially good with rich soups because the crunchy, tangy radish balances the warm broth.


    Storage Tips

    Store kkakdugi in an airtight container in the refrigerator.

    It can be eaten right away, but the flavor becomes deeper after 1 to 3 days.

    For the best texture, enjoy it within 2 to 3 weeks.

    Always use clean utensils when taking kkakdugi from the container.

    As it ferments, it will become more sour. Sour kkakdugi is excellent with soups, stews, fried rice, or noodles.


    Frequently Asked Questions

    Can I make kkakdugi without flour paste?

    Yes.

    This recipe uses cold cooked rice instead of flour paste.

    The rice helps the seasoning stick to the radish and supports fermentation.


    Can I use regular radish instead of Korean radish?

    Korean radish is best.

    Regular radish can be used, but the texture, sweetness, and water content may be different.


    How long should I salt the radish?

    About 30 minutes is enough for this recipe.

    Toss the radish once halfway through so it salts evenly.


    Should I rinse the radish after salting?

    For this recipe, rinsing is not necessary unless the radish tastes too salty.

    If you rinse it, drain it very well before adding the seasoning.


    Why should kkakdugi taste slightly salty before fermentation?

    Kimchi tastes better after fermentation when it is seasoned a little firmly at the beginning.

    If it tastes too bland before fermenting, it may taste flat later.


    How long should I ferment kkakdugi at room temperature?

    Usually about 1 day is enough.

    In warm weather, it may ferment faster.

    In cold weather, it may need more time.

    Move it to the refrigerator when it starts to smell pleasantly tangy.


    Can I eat kkakdugi right away?

    Yes.

    Fresh kkakdugi is crunchy, spicy, and lightly seasoned.

    After a few days, it becomes tangier and deeper in flavor.


    What can I use instead of allulose?

    You can use sugar, plum extract, corn syrup, or Korean cooking syrup.

    Adjust the amount to taste.


    Final Thoughts

    Kkakdugi is one of the easiest Korean kimchi recipes to make at home.

    With Korean radish, fish sauce, salted shrimp, onion, garlic, green onion, gochugaru, and a simple cold rice seasoning base, you can make crunchy and flavorful cubed radish kimchi without cooking flour paste.

    The key is to cut the radish evenly, salt it properly, blend the rice-based seasoning well, and season it slightly firmly before fermentation.

    If you want a simple Korean side dish that is crunchy, spicy, refreshing, and perfect with rice or soup, this Kkakdugi recipe is an excellent choice.

  • Haemul Jjim Recipe (Korean Spicy Braised Seafood)

    Haemul Jjim Recipe (Korean Spicy Braised Seafood)

    Haemul Jjim is a spicy Korean braised seafood dish made with squid, shrimp, mussels, clams, soybean sprouts, minari, onion, green onion, and a bold gochugaru-based sauce.

    This dish is spicy, savory, rich, and full of seafood flavor. It is especially satisfying because you can enjoy different textures in one dish: chewy squid, juicy shrimp, briny shellfish, crunchy soybean sprouts, and fragrant minari.

    Haemul Jjim looks generous and impressive, but it can be made with seafood that is easy to find at a local market or even frozen seafood from your freezer.


    What is Haemul Jjim?

    Haemul Jjim is Korean spicy braised seafood.

    “Haemul” means seafood, and “jjim” refers to a Korean braised or steamed dish. Unlike a soup or stew, haemul jjim has a thicker, more concentrated sauce that coats the seafood and vegetables.

    The dish is usually made with a mix of seafood, soybean sprouts, spicy seasoning, and starch water to create a thick and glossy sauce.

    It is a popular Korean restaurant-style dish, but it can also be made at home with simple ingredients.


    Recipe Information

    Prep Time: 20 minutes

    Cook Time: 10 to 15 minutes

    Total Time: 30 minutes

    Servings: 4

    Difficulty: Easy

    Cuisine: Korean

    Main Ingredient: Mixed seafood

    Best Served As: Korean main dish or drinking food


    Ingredients

    Main Ingredients

    2 squid

    500g shrimp

    400g mussels

    400g clams or other shellfish

    2 cups water

    2 tbsp kanari fish sauce

    2 bags soybean sprouts

    2 green onions

    2 handfuls minari

    1 onion

    2 tbsp gochugaru

    Sesame seeds, to taste


    Starch Water

    3 tbsp potato starch or cornstarch

    5 tbsp water


    Spicy Sauce

    7 tbsp soy sauce

    1 tbsp gochujang

    7 tbsp gochugaru

    2 tbsp sugar

    2 tbsp cheongju, mirin, or cooking wine

    2 tbsp minced garlic

    Black pepper, to taste


    Ingredient Notes

    Squid

    Squid adds a chewy texture and rich seafood flavor.

    Clean the squid well and cut it into bite-sized pieces. Do not overcook it, because squid can become tough.


    Shrimp

    Shrimp adds sweetness and a firm, juicy texture.

    If using whole shrimp, trim the whiskers and sharp parts with scissors. You can also remove the vein with a toothpick.


    Mussels and Clams

    Mussels and clams add deep briny flavor to the sauce.

    Clean them well before cooking. If using clams, purge them first if needed.


    Soybean Sprouts

    Soybean sprouts are essential in haemul jjim.

    They add crunch and volume, and they absorb the spicy sauce beautifully.

    Use a generous amount because they shrink as they cook.


    Minari

    Minari, also known as Korean water parsley, adds a fresh herbal aroma.

    Add it near the end so it keeps some freshness and texture.


    Onion and Green Onion

    Onion adds sweetness, while green onion adds aroma.

    Both help balance the spicy seafood sauce.


    Kanari Fish Sauce

    Kanari fish sauce adds salty, savory depth.

    If you do not have kanari fish sauce, you can use another Korean fish sauce.


    Gochugaru

    Gochugaru is the key ingredient for the spicy red color and heat.

    This recipe uses gochugaru in the sauce and again near the end for extra color and flavor.


    Gochujang

    Gochujang adds body, depth, and mild sweetness.

    Only 1 tablespoon is used because gochugaru is the main spicy ingredient in this dish.


    Starch Water

    Starch water thickens the sauce and gives haemul jjim its signature glossy texture.

    Mix the starch and water well before adding it to the pan.


    How to Make Haemul Jjim

    Step 1: Prepare the Seafood

    Prepare the squid, shrimp, mussels, and clams.

    Clean all seafood well.

    If using frozen seafood, thaw it first and drain excess water.

    For shrimp, trim the whiskers and sharp parts if needed.

    For clams, purge and rinse them well.


    Step 2: Prepare the Vegetables

    Rinse the soybean sprouts.

    Slice the green onions.

    Cut the minari into bite-sized lengths.

    Slice the onion.

    Set all vegetables aside.


    Step 3: Make the Spicy Sauce

    In a bowl, combine:

    • 7 tbsp soy sauce
    • 1 tbsp gochujang
    • 7 tbsp gochugaru
    • 2 tbsp sugar
    • 2 tbsp cheongju, mirin, or cooking wine
    • 2 tbsp minced garlic
    • Black pepper, to taste

    Mix well until the sauce becomes thick and evenly combined.

    This amount is enough for a generous 4-person portion.


    Step 4: Make the Starch Water

    In a small bowl, mix:

    • 3 tbsp starch
    • 5 tbsp water

    Stir well until smooth.

    Set aside and stir again right before using, because starch settles quickly.


    Step 5: Cook the Seafood

    Place the prepared seafood in a large pan or wide pot.

    Heat the pan until steam begins to rise.

    Add 2 cups of water.

    Add 2 tbsp kanari fish sauce.

    Boil until the shrimp turns red and the squid becomes slightly translucent.


    Step 6: Add Some Sauce First

    Add about 2 tablespoons of the prepared spicy sauce.

    Continue boiling.

    This gives the seafood an early layer of seasoning before the vegetables are added.


    Step 7: Add the Soybean Sprouts

    When the shellfish begin to open, add the rinsed soybean sprouts generously on top.

    Do not worry if the pan looks full. The soybean sprouts will shrink as they cook.


    Step 8: Add the Remaining Sauce

    Add the rest of the spicy sauce.

    Gently mix everything together.

    Be careful not to break the seafood or crush the soybean sprouts too much.


    Step 9: Add Minari, Onion, and Green Onion

    When the soybean sprouts begin to soften, add the minari, onion, and green onion.

    Toss gently so the vegetables mix with the seafood and sauce.


    Step 10: Add Extra Gochugaru

    Sprinkle 2 tbsp gochugaru over the top.

    Mix again.

    This adds stronger color, aroma, and spicy flavor.


    Step 11: Thicken with Starch Water

    Stir the starch water again.

    Slowly pour it into the pan while gently mixing.

    Keep stirring until the sauce thickens and becomes glossy.

    The sauce should coat the seafood and vegetables rather than remain watery.


    Step 12: Finish and Serve

    When the sauce becomes thick and the mixture feels slightly heavy while stirring, turn off the heat.

    Transfer the haemul jjim to a large serving plate.

    Sprinkle sesame seeds over the top.

    Serve hot.


    Pro Tips

    Use a Wide Pan

    Haemul jjim contains a lot of seafood and vegetables.

    A wide pan or wok makes it easier to mix everything without breaking the ingredients.


    Do Not Overcook the Seafood

    Seafood cooks quickly.

    Overcooked squid can become tough, and shrimp can become rubbery.

    Cook just until the seafood is done, then focus on thickening the sauce.


    Add Soybean Sprouts Generously

    Soybean sprouts shrink a lot during cooking.

    Even if two bags look like too much at first, they will reduce in volume.


    Add Minari Near the End

    Minari tastes best when it stays slightly fresh and aromatic.

    Add it near the end instead of cooking it from the beginning.


    Control the Thickness with Starch Water

    Add starch water gradually.

    If you add too much at once, the sauce may become too thick.

    Pour slowly and stir until you reach the texture you want.


    Use Frozen Seafood If Needed

    This recipe works well with frozen seafood.

    Just thaw and drain it well before cooking so the dish does not become watery.


    Make It Spicier

    For a spicier version, add more gochugaru or sliced Cheongyang chili peppers.


    What to Serve with Haemul Jjim

    Haemul Jjim pairs well with:

    • Steamed white rice
    • Kimchi
    • Kongnamul Guk
    • Miyeokguk
    • Gyeran Jjim
    • Korean pickled onions
    • Musaengchae
    • Oi Muchim
    • Myeolchi Bokkeum
    • Soju
    • Makgeolli

    It is also delicious as a shared main dish for family meals or casual gatherings.


    Storage Tips

    Haemul Jjim tastes best when freshly cooked.

    Seafood can become tough after reheating, so it is best to enjoy it right away.

    If you have leftovers, store them in an airtight container in the refrigerator.

    Eat within 1 day for the best texture and flavor.

    To reheat, warm gently in a pan over low heat.

    Add a small splash of water if the sauce has become too thick.

    Freezing is not recommended because seafood and soybean sprouts can lose their texture after thawing.


    Frequently Asked Questions

    Can I use frozen seafood?

    Yes.

    Frozen seafood works well for this recipe.

    Thaw it first, drain it well, and remove excess moisture before cooking.


    Can I use different seafood?

    Yes.

    You can use octopus, crab, scallops, or other shellfish.

    Use seafood that is easy to find and adjust the cooking time depending on the ingredient.


    What can I use instead of kanari fish sauce?

    You can use another Korean fish sauce.

    If you do not have fish sauce, you can use a small amount of soy sauce, but the flavor will be less deep.


    Is this dish very spicy?

    It is spicy, but you can adjust the heat.

    Use less gochugaru for a milder version, or add Cheongyang chili peppers for more heat.


    Why is my haemul jjim watery?

    The seafood or vegetables may have released too much moisture.

    Simmer a little longer before adding starch water, and make sure frozen seafood is well drained.


    Why did my sauce become too thick?

    Too much starch water may have been added.

    Add a little water and mix gently to loosen the sauce.


    Can I make this without minari?

    Yes.

    Minari gives the dish a fresh Korean flavor, but you can skip it if unavailable.

    You can also use a small amount of crown daisy or extra green onion.


    Can I make this ahead of time?

    It is not ideal.

    Haemul Jjim is best served immediately because seafood and soybean sprouts taste best when freshly cooked.

    You can prepare the sauce and clean the seafood in advance, then cook everything right before serving.


    Final Thoughts

    Haemul Jjim is a bold and generous Korean spicy braised seafood dish made with squid, shrimp, mussels, clams, soybean sprouts, minari, onion, green onion, and a thick red spicy sauce.

    It is full of flavor and texture, from chewy squid and juicy shrimp to crunchy soybean sprouts and fragrant minari. The starch water gives the sauce its glossy, restaurant-style finish.

    The key is to clean the seafood well, cook it just until done, add plenty of soybean sprouts, and thicken the sauce gradually.

    If you want a spicy Korean seafood dish that is hearty, impressive, and perfect for sharing, this Haemul Jjim recipe is an excellent choice.
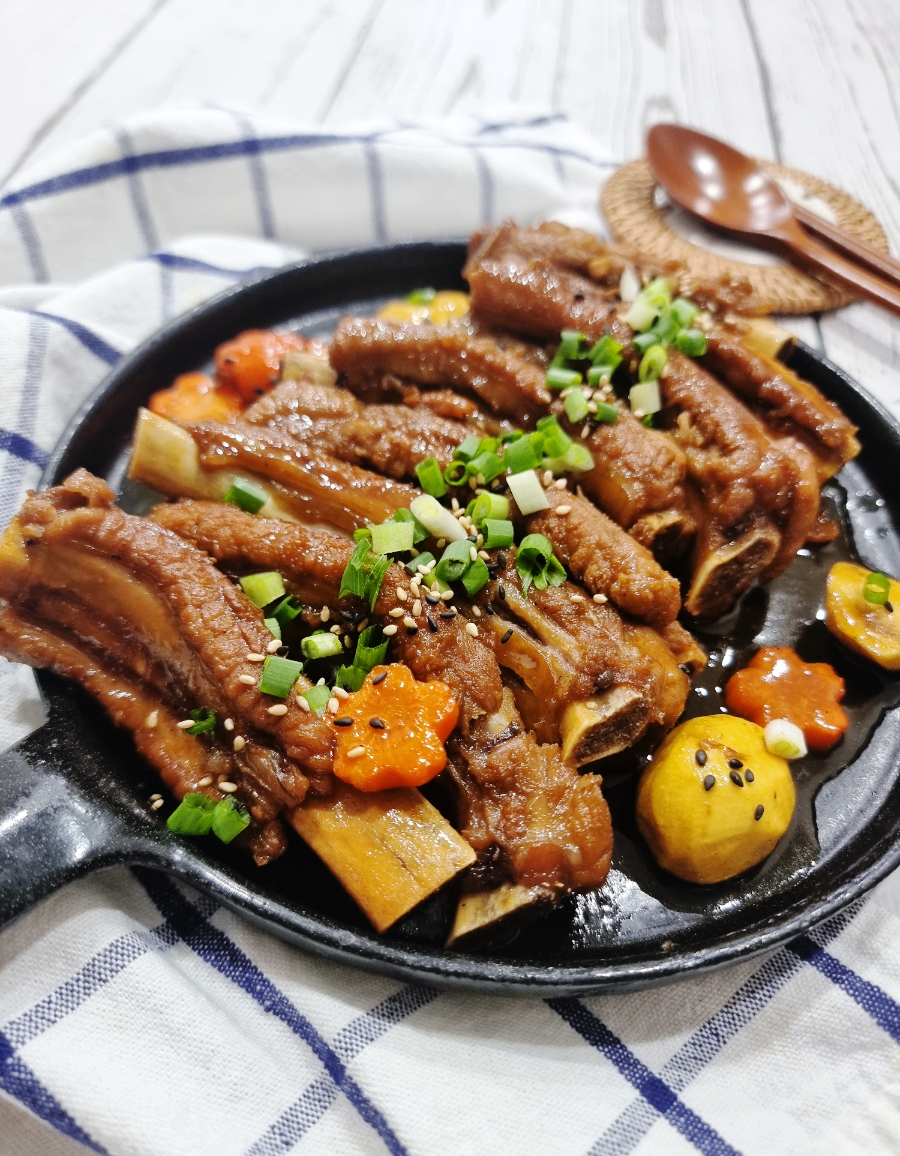
  • Galbijjim Recipe (Korean Braised Short Ribs)

    Galbijjim Recipe (Korean Braised Short Ribs)

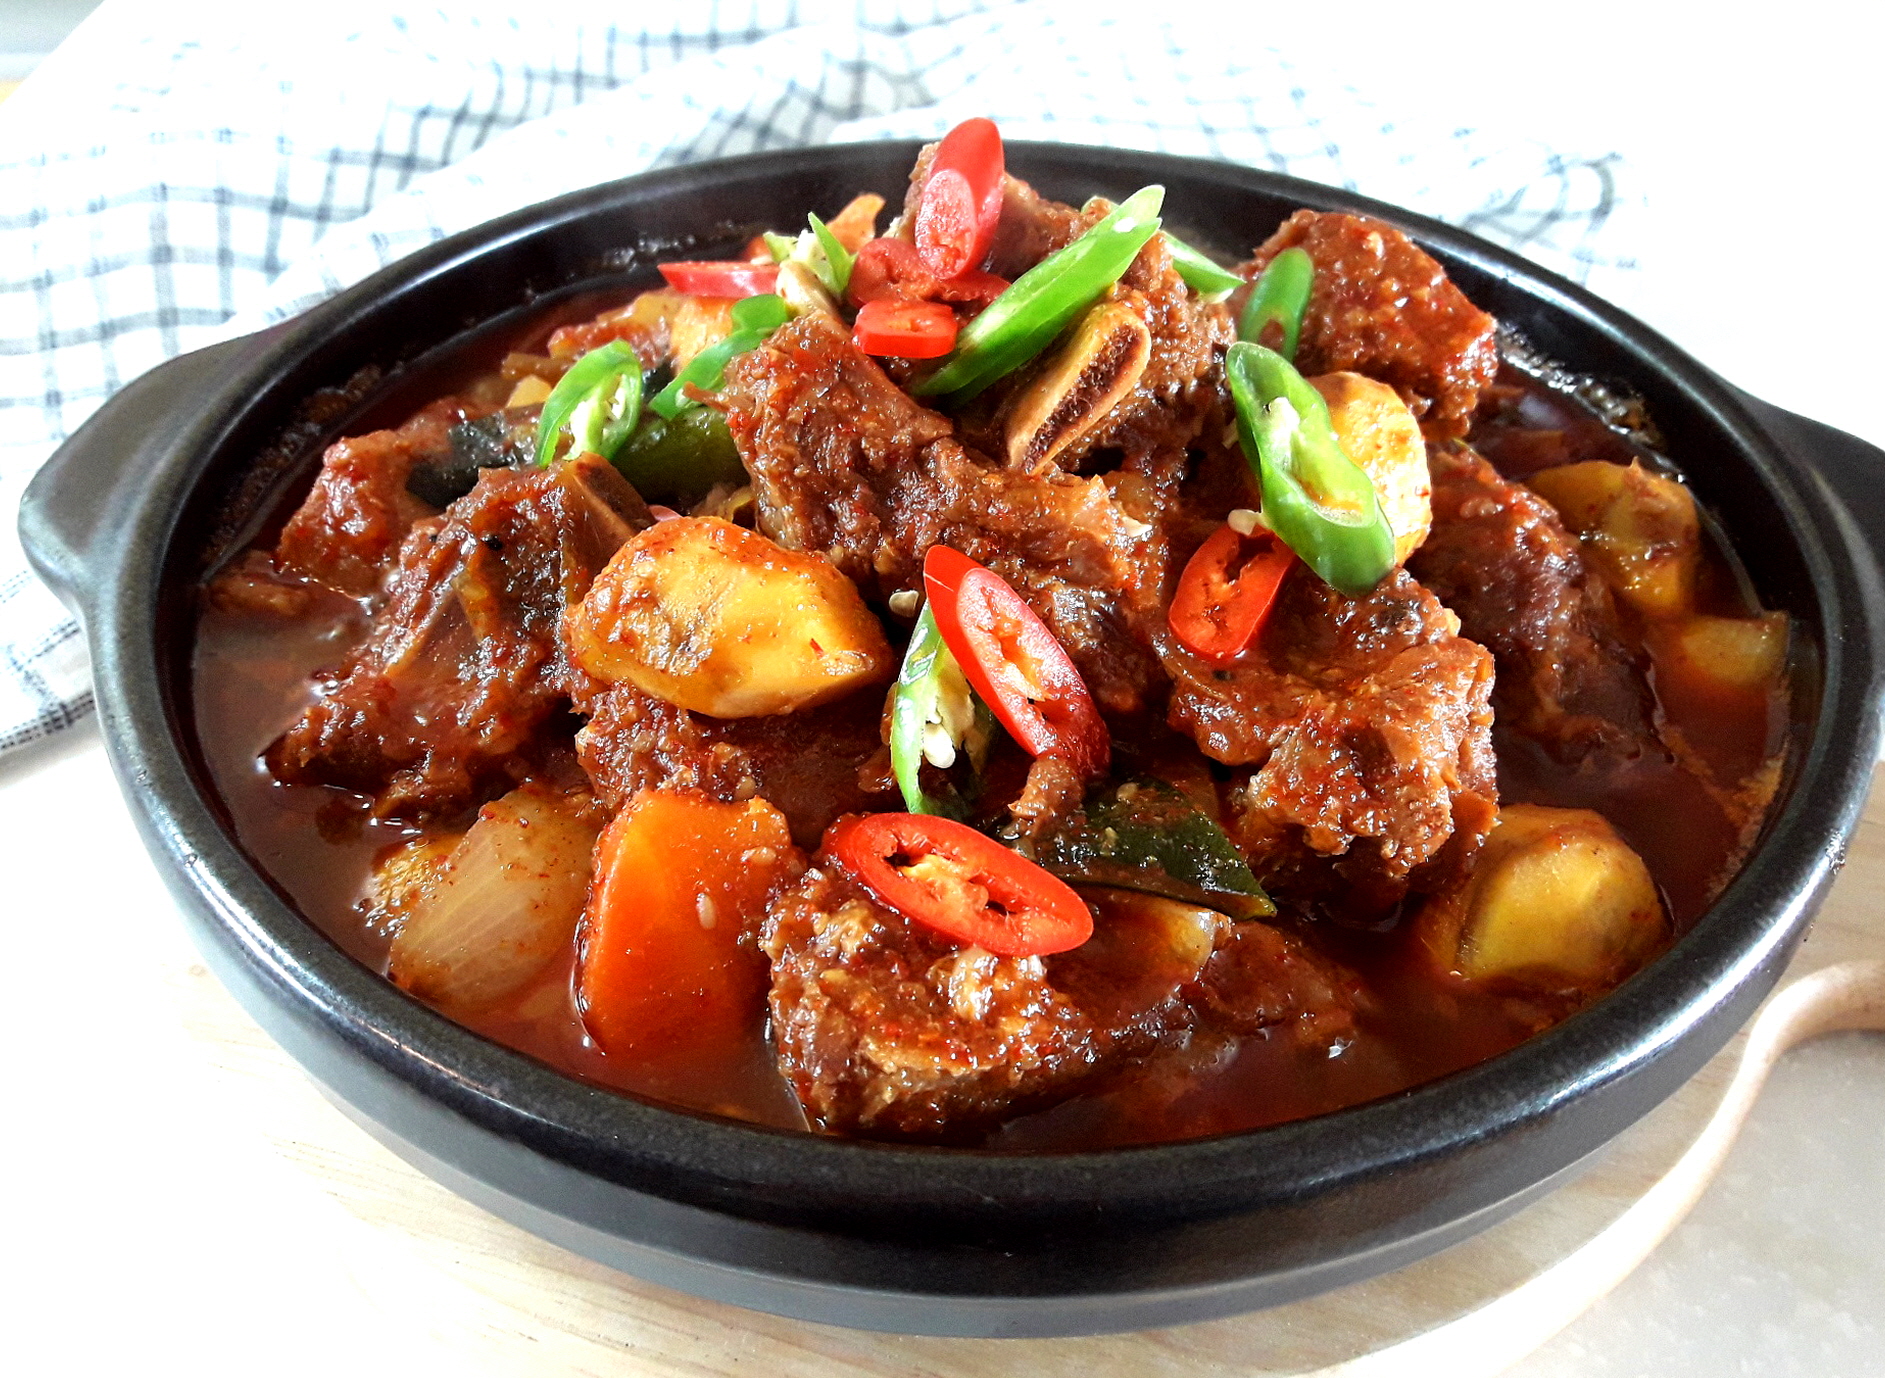
    Galbijjim is a classic Korean braised short rib dish made with beef short ribs, radish, carrot, green onion, pear, onion, soy sauce, garlic, cooking wine, sugar, and sesame oil.

    This dish is rich, savory, slightly sweet, and deeply comforting. The beef short ribs are soaked to remove blood, briefly parboiled to remove impurities, marinated in a soy sauce-based sauce, and slowly braised until tender.

    Galbijjim is often served for birthdays, holidays, family gatherings, and special Korean meals. It looks impressive on the table, but the process is simple if you follow each step carefully.


    What is Galbijjim?

    Galbijjim is Korean braised beef short ribs.

    “Galbi” means ribs, and “jjim” refers to a Korean braised or steamed dish. Unlike grilled galbi, galbijjim is slowly cooked in a savory-sweet sauce until the meat becomes tender and flavorful.

    This version uses pear and onion in the marinade. Pear helps tenderize the meat naturally, while onion adds sweetness and depth. Radish and carrot absorb the sauce as they cook, making the dish even more satisfying.

    Galbijjim is one of the most popular Korean celebration dishes and is often served on birthday tables or holiday meals.


    Recipe Information

    Prep Time: 4 hours

    Cook Time: 1 hour 30 minutes to 2 hours

    Total Time: 5 to 6 hours, including soaking time

    Servings: 4

    Difficulty: Easy to Moderate

    Cuisine: Korean

    Main Ingredient: Beef short ribs

    Best Served For: Birthday meals, holidays, family dinners, and special occasions


    Ingredients

    Main Ingredients

    800g to 900g beef short ribs

    2 thick pieces Korean radish, about 5cm thick

    1/2 carrot

    1 green onion

    1 cup water, if using a regular pot

    Marinade Ingredients

    1/2 Korean pear

    1/2 onion

    2 tbsp minced garlic

    10 tbsp soy sauce

    2 tbsp oligosaccharide syrup

    1 tbsp oyster sauce

    5 tbsp cooking wine

    4 tbsp cheongju or rice wine

    2 tbsp sugar

    0.3 tbsp minced ginger

    0.3 tbsp black pepper

    0.5 tbsp sesame oil

    Optional Add-Ins

    Jujubes

    Chestnuts

    Shiitake mushrooms

    Ginkgo nuts


    Ingredient Notes

    Beef Short Ribs

    Beef short ribs are the main ingredient of galbijjim.

    Choose meaty short ribs if possible. Soaking them in cold water helps remove blood and gives the final dish a cleaner taste.

    For best results, soak the ribs for 3 to 4 hours and change the water several times.


    Korean Radish

    Korean radish becomes soft and sweet as it cooks.

    It absorbs the braising sauce and balances the richness of the beef.

    Cut the radish into large pieces so it does not break apart too quickly.


    Carrot

    Carrot adds color and gentle sweetness.

    For a cleaner presentation, round the edges slightly after cutting. This helps prevent the carrot from breaking during braising.


    Pear

    Pear is commonly used in Korean meat marinades.

    It adds natural sweetness and helps tenderize the beef.

    If you do not have pear, kiwi can be used, but use it carefully because kiwi tenderizes meat very quickly.


    Onion

    Onion adds sweetness and depth to the sauce.

    Blending onion with pear creates a smooth marinade that coats the ribs well.


    Soy Sauce

    Soy sauce is the base of the galbijjim seasoning.

    It provides saltiness and savory depth.


    Oyster Sauce

    Oyster sauce adds extra umami and richness.

    Only a small amount is needed.


    Cooking Wine and Rice Wine

    Cooking wine and rice wine help reduce beef odor and add depth to the sauce.

    They also make the braising sauce taste smoother.


    Oligosaccharide Syrup

    Oligosaccharide syrup adds sweetness and gives the sauce a glossy finish.

    You can also use corn syrup or Korean cooking syrup.


    Sesame Oil

    Sesame oil adds nutty aroma.

    Use a small amount because galbijjim should taste rich but not oily.


    How to Make Galbijjim

    Step 1: Soak the Beef Short Ribs

    Place the beef short ribs in a large bowl.

    Cover them with cold water.

    Soak for 3 to 4 hours to remove excess blood.

    Change the water 3 to 4 times during soaking.

    This step helps remove strong beef odor and gives the dish a cleaner flavor.


    Step 2: Parboil the Ribs

    Fill a pot with water and bring it to a boil.

    Once the water is boiling, add the soaked beef short ribs.

    Boil for about 3 minutes.

    This removes impurities, blood residue, and excess fat from the ribs.


    Step 3: Rinse the Ribs

    Remove the parboiled ribs from the pot.

    Rinse them under cold water.

    Clean off any foam, bone fragments, or impurities.

    Drain well.


    Step 4: Blend the Pear and Onion

    Place 1/2 pear and 1/2 onion in a blender.

    Blend until smooth.

    Transfer the blended mixture to a bowl.


    Step 5: Make the Marinade

    To the blended pear and onion, add:

    • 2 tbsp minced garlic
    • 10 tbsp soy sauce
    • 2 tbsp oligosaccharide syrup
    • 1 tbsp oyster sauce
    • 5 tbsp cooking wine
    • 4 tbsp rice wine
    • 2 tbsp sugar
    • 0.3 tbsp minced ginger
    • 0.3 tbsp black pepper
    • 0.5 tbsp sesame oil

    Mix well until the marinade is evenly combined.


    Step 6: Marinate the Ribs

    Pour the marinade over the cleaned beef short ribs.

    Mix so the ribs are evenly coated.

    For the best flavor, cover and refrigerate overnight.

    If you do not have time, you can cook the ribs right away, but overnight marinating gives a deeper flavor.


    Step 7: Prepare the Vegetables

    Cut the Korean radish into large chunks.

    Cut the carrot into large pieces.

    Round the edges of the radish and carrot if you want a neater presentation.

    Slice the green onion diagonally.

    Prepare optional jujubes, chestnuts, or mushrooms if using.


    Step 8: Start Braising

    Place the marinated beef short ribs and marinade into a pot.

    Add 1 cup of water if using a regular pot.

    Cover with a lid.

    Cook until the beef becomes tender.

    For a pressure cooker, do not add extra water because too much liquid can weaken the flavor.


    Step 9: Remove Excess Fat

    Once the beef is mostly cooked, open the lid.

    Use a spoon to skim off excess fat from the surface.

    This makes the final sauce cleaner and less greasy.


    Step 10: Add Radish and Carrot

    Add the prepared radish and carrot to the pot.

    Continue cooking until the vegetables become tender and the sauce reduces.

    The liquid should become slightly thick and flavorful.


    Step 11: Add Green Onion

    Add the sliced green onion near the end.

    Cook briefly until the green onion softens slightly.

    Do not overcook it, because green onion tastes best when it still has some freshness.


    Step 12: Serve

    Turn off the heat.

    Transfer the galbijjim to a serving dish.

    Serve hot with steamed rice and Korean side dishes.


    Pro Tips

    Soak the Ribs Long Enough

    Soaking the ribs for 3 to 4 hours removes blood and helps reduce odor.

    Change the water several times for the cleanest flavor.


    Parboil Before Braising

    Do not skip the parboiling step.

    It removes impurities and helps the braising sauce stay clean and glossy.


    Marinate Overnight If Possible

    Galbijjim tastes much better when the ribs absorb the marinade overnight.

    This is especially useful when preparing the dish for a birthday meal or guest dinner.


    Use Pear for Tender Meat

    Pear adds natural sweetness and helps tenderize the beef.

    If using kiwi instead, use a small amount and do not marinate for too long, because kiwi can make the meat too soft.


    Skim the Fat

    Beef short ribs release fat as they cook.

    Skimming the fat makes the dish cleaner and more elegant.


    Add Vegetables After the Meat Starts to Soften

    Radish and carrot can break apart if cooked for too long.

    Add them after the beef is already partly tender.


    Reduce the Sauce Gently

    Galbijjim should not be watery.

    Simmer until the sauce becomes rich and lightly coats the ribs and vegetables.


    What to Serve with Galbijjim

    Galbijjim pairs well with:

    • Steamed white rice
    • Kimchi
    • Miyeokguk
    • Kongnamul Guk
    • Japchae
    • Gyeran Jjim
    • Korean pickled onions
    • Musaengchae
    • Oi Muchim
    • Dubu Jorim
    • Korean vegetable side dishes

    For a birthday meal, galbijjim is especially good with miyeokguk, rice, japchae, and a few simple banchan.


    Storage Tips

    Store leftover galbijjim in an airtight container in the refrigerator.

    It is best eaten within 2 to 3 days.

    To reheat, place the ribs and sauce in a pot and warm over low to medium heat.

    Add a small splash of water if the sauce has become too thick.

    Galbijjim often tastes even better the next day because the meat absorbs more sauce.

    Freezing is possible, but the radish and carrot may become softer after thawing.


    Frequently Asked Questions

    Can I make galbijjim without pear?

    Yes.

    You can skip pear or replace it with a small amount of grated apple.

    Pear gives the best traditional flavor and helps tenderize the meat.


    Can I use kiwi instead of pear?

    Yes, but use kiwi carefully.

    Kiwi tenderizes meat strongly, so too much kiwi or too much marinating time can make the meat mushy.


    Do I have to marinate the ribs overnight?

    No.

    You can cook the ribs right after adding the marinade, but overnight marinating gives a deeper and better flavor.


    Why do I need to soak the ribs?

    Soaking removes excess blood from the beef.

    This helps reduce odor and gives the final dish a cleaner taste.


    Why do I need to parboil the ribs?

    Parboiling removes impurities, foam, and excess fat.

    It also helps the braising sauce stay cleaner.


    Can I make this in a pressure cooker?

    Yes.

    A pressure cooker makes the beef more tender in less time.

    If using a pressure cooker, do not add extra water because the marinade and meat will release liquid during cooking.


    Can I add chestnuts or jujubes?

    Yes.

    Chestnuts, jujubes, mushrooms, and ginkgo nuts are common additions for special occasion galbijjim.

    They make the dish look more festive.


    Why is my galbijjim too salty?

    The sauce may have reduced too much.

    Add a little water and simmer briefly to balance the flavor.

    Next time, reduce the sauce more slowly and taste as it cooks.


    Why is my beef still tough?

    The ribs need more time.

    Continue simmering until the meat becomes tender.

    Add a little water if the sauce reduces before the beef is fully cooked.


    Final Thoughts

    Galbijjim is one of the most beloved Korean braised beef dishes, often served for birthdays, holidays, and special family meals.

    The combination of beef short ribs, pear, onion, soy sauce, garlic, cooking wine, rice wine, radish, carrot, and green onion creates a rich, savory, slightly sweet dish that feels both comforting and special.

    The key is to soak the ribs well, parboil and rinse them, marinate them for deeper flavor, and braise slowly until the meat becomes tender and the sauce reduces.

    If you want a Korean birthday meal or celebration dish that is impressive, hearty, and deeply flavorful, this Galbijjim recipe is an excellent choice.

  • Soy Sauce Braised Pork Back Ribs Recipe (Korean Dwaeji Deunggalbi Jjim)

    Soy Sauce Braised Pork Back Ribs Recipe (Korean Dwaeji Deunggalbi Jjim)

    Soy Sauce Braised Pork Back Ribs, also known as Korean Dwaeji Deunggalbi Jjim, is a savory and slightly sweet Korean braised pork rib dish made with pork back ribs, soy sauce, garlic, sugar, plum extract, cooking wine, sesame oil, and syrup.

    This recipe is rich, tender, glossy, and perfect as a Korean dinner main dish. The pork ribs are first parboiled with bay leaves and peppercorns to remove impurities, then braised in a soy sauce-based seasoning until the sauce reduces and coats the ribs beautifully.

    It is a great dish for guests, family dinners, holidays, or any meal where you want a satisfying Korean meat dish that pairs perfectly with steamed rice.


    What is Dwaeji Deunggalbi Jjim?

    Dwaeji Deunggalbi Jjim is a Korean braised pork back rib dish.

    “Dwaeji” means pork, “deunggalbi” means pork back ribs, and “jjim” refers to a Korean braised or steamed dish.

    Unlike spicy pork rib dishes, this version uses a soy sauce-based seasoning. The flavor is savory, slightly sweet, garlicky, and comforting. As the ribs simmer, the sauce reduces into a glossy glaze and the meat becomes tender.

    This dish is especially good when served as the main dish for a Korean-style dinner table.


    Recipe Information

    Prep Time: 20 minutes

    Cook Time: 40 minutes

    Total Time: 60 minutes

    Servings: 3

    Difficulty: Easy to Moderate

    Cuisine: Korean

    Main Ingredient: Pork back ribs

    Best Served With: Steamed rice


    Ingredients

    Main Ingredients

    600g pork back ribs

    A few bay leaves

    A few whole black peppercorns

    5 whole garlic cloves

    Optional chopped green onion or chives, for garnish

    Sesame seeds, for garnish

    Soy Sauce Braising Sauce

    350ml water

    2 tbsp sugar

    4 tbsp soy sauce

    1 tbsp plum extract

    2 tbsp corn syrup or Korean cooking syrup

    2 tbsp cooking wine

    1 tbsp sesame oil

    2 tbsp minced garlic


    Ingredient Notes

    Pork Back Ribs

    Pork back ribs are tender, flavorful, and perfect for braising.

    Cutting them evenly helps the ribs cook at the same speed. For braising, it is better to cut between the meat portions so each piece has a good balance of meat and bone.

    Soaking the ribs in cold water before cooking helps remove excess blood and gives the final dish a cleaner flavor.


    Bay Leaves and Whole Peppercorns

    Bay leaves and whole peppercorns are used when parboiling the ribs.

    They help reduce pork odor and make the meat taste cleaner.

    If you do not have whole peppercorns, you can use a little instant coffee or leftover soju when parboiling the ribs.


    Soy Sauce

    Soy sauce is the base of the braising sauce.

    It gives the dish deep savory flavor and saltiness.


    Plum Extract

    Plum extract adds gentle sweetness and a light fruity acidity.

    It helps balance the richness of the pork.


    Corn Syrup or Korean Cooking Syrup

    Syrup gives the sauce sweetness and a glossy finish.

    If you do not have corn syrup, you can use oligosaccharide syrup or honey.


    Cooking Wine

    Cooking wine helps reduce pork smell and adds depth to the sauce.

    Mirin or Korean cooking wine both work well.


    Garlic

    This recipe uses both minced garlic and whole garlic cloves.

    Minced garlic flavors the sauce, while whole garlic cloves become soft and sweet as they braise.


    Sesame Oil

    Sesame oil adds nutty aroma and makes the sauce taste richer.

    Add it as part of the sauce for a deeper Korean flavor.


    How to Make Soy Sauce Braised Pork Back Ribs

    Step 1: Prepare the Pork Back Ribs

    Prepare 600g of pork back ribs.

    If the ribs are not already cut, cut them into even pieces.

    For braising, cut through the meat sections so the pieces cook evenly and are easy to serve.


    Step 2: Soak the Ribs

    Place the ribs in a bowl of cold water.

    Let them soak to remove excess blood.

    If the water becomes cloudy or red, change the water once.

    This step helps reduce pork odor and gives the dish a cleaner taste.


    Step 3: Parboil the Ribs

    Bring a pot of water to a boil.

    Add a few bay leaves and whole black peppercorns.

    Add the pork back ribs and boil briefly.

    This removes impurities from the meat.


    Step 4: Rinse the Ribs

    Drain the parboiled ribs.

    Rinse them under clean water.

    Remove any foam or impurities from the surface.

    Place the cleaned ribs in a wok or pot.


    Step 5: Make the Soy Sauce Braising Sauce

    In a bowl, combine:

    • 350ml water
    • 2 tbsp sugar
    • 4 tbsp soy sauce
    • 1 tbsp plum extract
    • 2 tbsp corn syrup
    • 2 tbsp cooking wine
    • 1 tbsp sesame oil
    • 2 tbsp minced garlic

    Mix well until the sugar is mostly dissolved.


    Step 6: Add the Sauce to the Ribs

    Pour the prepared sauce over the ribs in the wok or pot.

    Add 5 whole garlic cloves.

    If you have sliced green onion, you can add a little at this stage, but it is optional.


    Step 7: Braise Over High Heat

    Turn the heat to high.

    Bring the sauce to a boil.

    Cook over high heat for about 30 minutes.

    As the sauce boils, the ribs will absorb the seasoning and the liquid will begin to reduce.


    Step 8: Reduce the Heat

    When the sauce becomes slightly reduced, lower the heat to medium-low.

    Continue simmering slowly.

    This helps the ribs become tender and allows the sauce to thicken without burning.


    Step 9: Reduce Until Glossy

    Keep braising until the sauce becomes thick, glossy, and coats the ribs.

    Spoon the sauce over the ribs occasionally while cooking.

    This helps the flavor cover the meat evenly.


    Step 10: Garnish and Serve

    Transfer the braised pork back ribs to a serving plate.

    Sprinkle with chopped chives or green onion if desired.

    Finish with plenty of sesame seeds.

    Serve hot with steamed rice.


    Pro Tips

    Soak the Ribs Before Cooking

    Soaking the ribs removes excess blood and helps prevent a strong pork smell.

    This is an important step for a cleaner-tasting braised rib dish.


    Do Not Skip the Parboiling Step

    Parboiling removes impurities and foam from the pork.

    After parboiling, rinse the ribs well before braising them in the sauce.


    Use Bay Leaves and Peppercorns

    Bay leaves and peppercorns help reduce odor when boiling pork.

    If you do not have peppercorns, a small amount of soju or instant coffee can also help.


    Start on High Heat, Finish on Lower Heat

    High heat helps the sauce boil and reduce quickly at first.

    Once the liquid becomes lower, reduce the heat so the sauce does not burn.


    Simmer Until the Sauce Coats the Ribs

    This dish tastes best when the sauce is not watery.

    Let it reduce until the ribs look glossy and well-coated.


    Taste Before Adding More Salt

    Soy sauce gives enough saltiness, and the sauce becomes stronger as it reduces.

    Taste near the end before adding any extra seasoning.


    What to Serve with Soy Sauce Braised Pork Back Ribs

    Soy Sauce Braised Pork Back Ribs pair well with:

    • Steamed white rice
    • Kimchi
    • Kongnamul Guk
    • Miyeokguk
    • Korean pickled onions
    • Musaengchae
    • Gyeran Jjim
    • Gamja Jorim
    • Eomuk Bokkeum
    • Myeolchi Bokkeum
    • Lettuce wraps
    • Korean vegetable side dishes

    This dish works well as the main protein for a Korean dinner table.


    Storage Tips

    Store leftover braised pork back ribs in an airtight container in the refrigerator.

    They are best eaten within 2 to 3 days.

    To reheat, place the ribs and sauce in a pot and warm over low heat.

    Add a small splash of water if the sauce has become too thick.

    You can also reheat them in the microwave, but reheating in a pot gives the best texture.

    Freezing is possible, but the sauce texture and meat moisture may change slightly after thawing.


    Frequently Asked Questions

    Can I use regular pork ribs instead of pork back ribs?

    Yes.

    You can use regular pork ribs, but the cooking time may vary depending on the size and thickness of the ribs.


    Do I have to soak the ribs?

    It is highly recommended.

    Soaking helps remove blood and gives the final dish a cleaner flavor.


    Why do I need to parboil the ribs?

    Parboiling removes impurities, foam, and excess odor from the pork.

    It makes the braising sauce cleaner and more pleasant.


    Can I make this without plum extract?

    Yes.

    If you do not have plum extract, you can skip it or replace it with a small amount of extra cooking wine or syrup.

    The flavor will be slightly different, but the dish will still be delicious.


    What can I use instead of corn syrup?

    You can use oligosaccharide syrup, Korean cooking syrup, honey, or maple syrup.

    Syrup helps create a glossy finish.


    Can I add vegetables?

    Yes.

    Carrot, potato, onion, mushrooms, or Korean radish can be added.

    If using vegetables that soften quickly, add them later so they do not fall apart.


    Why is my sauce too salty?

    The sauce may have reduced too much.

    Add a small splash of water and simmer briefly to balance it.

    Next time, reduce the sauce more slowly and taste as it cooks.


    Why is my pork still tough?

    It may need more time.

    Continue simmering over medium-low heat until the meat becomes tender.

    Add more water if the sauce reduces before the ribs are fully tender.


    Final Thoughts

    Soy Sauce Braised Pork Back Ribs are a rich, savory, and slightly sweet Korean pork rib dish that works beautifully as a dinner main dish or guest-worthy meal.

    The ribs are soaked, parboiled with bay leaves and peppercorns, rinsed clean, and then braised in a soy sauce-based sauce with garlic, sugar, plum extract, syrup, cooking wine, and sesame oil.

    The key is to clean the ribs well, start the braising over high heat, then reduce the heat as the sauce thickens. When the sauce becomes glossy and coats the ribs, the dish is ready.

    If you want a Korean pork rib recipe that is comforting, flavorful, and impressive enough for guests, this Soy Sauce Braised Pork Back Ribs recipe is an excellent choice.
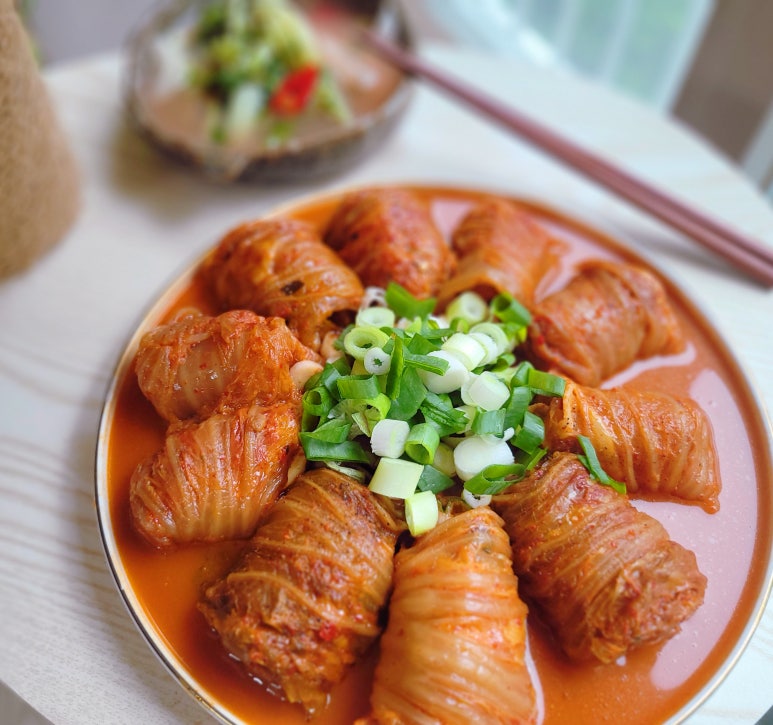
  • Samgyeopsal Kimchi Mari Jjim Recipe (Korean Pork Belly Kimchi Rolls)

    Samgyeopsal Kimchi Mari Jjim Recipe (Korean Pork Belly Kimchi Rolls)

    Samgyeopsal Kimchi Mari Jjim is a Korean braised dish made by rolling pork belly inside kimchi leaves, then simmering the rolls in a rich broth with green onion, chili peppers, and gochujang.

    This dish looks impressive, but it is surprisingly simple to make. The pork belly becomes tender and juicy, the kimchi turns soft and deeply flavorful, and the broth becomes rich, spicy, savory, and comforting.

    It is a great Korean main dish for family meals, housewarming parties, dinner gatherings, or any time you want a hearty dish that pairs perfectly with steamed rice.


    What is Samgyeopsal Kimchi Mari Jjim?

    Samgyeopsal Kimchi Mari Jjim is a Korean braised pork belly and kimchi roll dish.

    The word “samgyeopsal” means pork belly, “kimchi” means fermented Korean cabbage, “mari” means rolled, and “jjim” means braised or steamed dish.

    The basic idea is simple: wrap pork belly with kimchi, place the rolls in a pot, add broth, and simmer until everything becomes tender and flavorful.

    This dish is similar in flavor to kimchi jjim, but the rolled shape makes it more attractive and easier to serve.


    Recipe Information

    Prep Time: 15 minutes

    Cook Time: 30 minutes

    Total Time: 45 minutes

    Servings: 4

    Difficulty: Easy

    Cuisine: Korean

    Main Ingredient: Pork belly and kimchi

    Best Served With: Steamed white rice


    Ingredients

    Main Ingredients

    About 1.2kg pork belly

    1/2 head napa cabbage kimchi

    2 green onions

    1 red chili pepper

    2 Cheongyang chili peppers

    2 packs store-bought beef bone broth

    1 tbsp gochujang


    Ingredient Notes

    Pork Belly

    Pork belly gives this dish a rich and juicy flavor.

    If the pork belly strips are too long, cut them in half before rolling. Smaller pieces are easier to roll, cook, and eat.


    Kimchi

    Use napa cabbage kimchi with large leaves.

    Well-fermented kimchi gives the best flavor because it becomes soft and tangy as it simmers.

    If the kimchi leaves are too large, cut them in half. If they are small, you can use them as they are.


    Beef Bone Broth

    Store-bought beef bone broth makes this recipe easy and flavorful.

    Most packaged bone broths are already seasoned, so you usually do not need to add extra salt or soy sauce.


    Gochujang

    Gochujang adds depth, mild heat, and a richer red color to the broth.

    Only 1 tablespoon is enough because kimchi and bone broth already have strong flavor.


    Green Onion

    Green onion adds aroma and freshness.

    It also helps balance the richness of the pork belly.


    Chili Peppers

    Red chili pepper adds color, while Cheongyang chili pepper adds heat.

    Use more or less depending on how spicy you want the dish to be.


    How to Make Samgyeopsal Kimchi Mari Jjim

    Step 1: Prepare the Pork Belly and Kimchi

    Prepare pork belly and half a head of kimchi.

    Cut the pork belly strips in half if they are too long.

    Cut large kimchi leaves in half if needed.

    The rolls should be small enough to fit comfortably in the pot and easy to eat.


    Step 2: Prepare the Vegetables

    Slice the green onions.

    Slice the red chili pepper.

    Slice the Cheongyang chili peppers.

    Set them aside.


    Step 3: Roll the Pork Belly with Kimchi

    Place one kimchi leaf flat on a cutting board.

    Place a piece of pork belly on top of the kimchi.

    Roll it tightly from the inside of the kimchi leaf to the outer edge.

    Repeat until all the pork belly and kimchi are used.


    Step 4: Arrange the Rolls in a Pot

    Place the kimchi pork belly rolls in a pot.

    Arrange them in a circular pattern if possible.

    Try to place them snugly so they hold their shape while cooking.


    Step 5: Add the First Pack of Broth

    Pour in one pack of store-bought beef bone broth.

    The broth should come up around the rolls.

    If needed, add a little more broth or water.


    Step 6: Add Gochujang and Vegetables

    Add 1 tablespoon of gochujang.

    Add the sliced green onion, red chili pepper, and Cheongyang chili peppers.

    Turn the heat to high and bring everything to a boil.


    Step 7: Simmer with the Lid On

    Once the broth starts boiling strongly, cover the pot with a lid.

    Continue simmering until the broth reduces and the kimchi begins to soften.

    The pork belly should cook through and release flavor into the broth.


    Step 8: Add the Second Pack of Broth

    When the broth has reduced and the kimchi still needs more time to soften, add the second pack of beef bone broth.

    Bring it back to a boil.

    Continue simmering until the kimchi becomes tender and the broth reduces again.


    Step 9: Finish the Dish

    When the pork belly is fully cooked, the kimchi is soft, and the broth has reduced to a rich sauce, turn off the heat.

    The kimchi rolls should look glossy, tender, and deeply seasoned.


    Step 10: Serve

    Serve hot with freshly cooked rice.

    Spoon some of the spicy broth over the rice for extra flavor.


    Pro Tips

    Use Well-Fermented Kimchi

    Sour kimchi works best for this dish.

    It gives the broth a deeper, tangier, and more satisfying flavor.


    Cut Large Pork Belly Strips in Half

    If the pork belly is too long, the rolls become too big and hard to eat.

    Smaller rolls cook more evenly and look better when served.


    Do Not Add Extra Salt Too Early

    Store-bought beef bone broth is usually already seasoned.

    Kimchi is also salty, so taste the broth before adding any extra seasoning.


    Add Broth in Two Stages

    Adding one pack first, then adding the second pack later helps the kimchi cook longer and become softer without drying out.


    Use Water if You Do Not Have Bone Broth

    You can make this dish with water, but the flavor will be lighter.

    If using water, you may need to add a little more gochujang, soy sauce, garlic, or kimchi juice.


    Make It Spicier

    For a spicier version, add more Cheongyang chili peppers or a little gochugaru.

    If serving children or people who prefer mild food, reduce the chili peppers.


    What to Serve with Samgyeopsal Kimchi Mari Jjim

    Samgyeopsal Kimchi Mari Jjim pairs well with:

    • Steamed white rice
    • Gyeran Jjim
    • Korean pickled onions
    • Kongnamul Guk
    • Miyeokguk
    • Musaengchae
    • Eomuk Bokkeum
    • Myeolchi Bokkeum
    • Lettuce wraps
    • Soju

    It is rich and flavorful enough to be the main dish of a Korean meal.


    Storage Tips

    Store leftovers in an airtight container in the refrigerator.

    It is best eaten within 2 to 3 days.

    To reheat, place the rolls and broth in a pot and warm over low to medium heat.

    Add a small splash of water or broth if the sauce has become too thick.

    This dish often tastes even better the next day because the pork belly and kimchi absorb more flavor.

    Freezing is possible, but the kimchi texture may become softer after thawing.


    Frequently Asked Questions

    Can I use water instead of beef bone broth?

    Yes.

    You can use water, but the dish will taste lighter.

    If using water, add more kimchi juice, gochujang, or a small amount of soy sauce to build more flavor.


    What kind of kimchi should I use?

    Use napa cabbage kimchi with large leaves.

    Well-fermented kimchi works best because it becomes tender and flavorful when braised.


    Can I make this less spicy?

    Yes.

    Skip the Cheongyang chili peppers and use only a small amount of gochujang.

    You can also avoid adding gochugaru if you want a mild version.


    Can I prepare the rolls ahead of time?

    Yes.

    You can roll the pork belly with kimchi in advance and store the rolls in the refrigerator.

    This makes the final cooking process faster, especially for guests or gatherings.


    Why is my broth too salty?

    The beef bone broth and kimchi may already contain salt.

    Do not add extra salt or soy sauce unless you taste the broth first.

    If it becomes too salty, add a little water to balance it.


    Can I use thin pork slices instead of pork belly?

    Yes.

    Thin pork shoulder or pork collar slices can be used, but pork belly gives the richest flavor and juiciest texture.


    How do I keep the rolls from falling apart?

    Roll them tightly and place them snugly in the pot.

    Arranging them close together helps them hold their shape while simmering.


    Final Thoughts

    Samgyeopsal Kimchi Mari Jjim is a simple but impressive Korean braised dish made with pork belly, kimchi, beef bone broth, green onion, chili peppers, and gochujang.

    The rolled shape makes it look special, while the cooking process stays easy. As the dish simmers, the pork belly becomes tender, the kimchi becomes soft, and the broth turns rich, spicy, and deeply savory.

    The key is to use well-fermented kimchi, roll the pork belly tightly, simmer with seasoned broth, and avoid adding extra salt too early.

    If you want a Korean main dish that is perfect for rice, guests, or a comforting dinner, this Samgyeopsal Kimchi Mari Jjim recipe is a perfect choice.

  • Spicy Galbijjim Recipe (Korean Spicy Braised Pork Ribs)

    Spicy Galbijjim Recipe (Korean Spicy Braised Pork Ribs)

    Spicy Galbijjim is a Korean braised pork rib dish made with pork ribs, potatoes, onion, green onion, garlic, soy sauce, gochujang, gochugaru, sesame oil, and a sweet-spicy seasoning sauce.

    This dish is rich, spicy, savory, slightly sweet, and deeply satisfying. The pork ribs are first soaked to remove blood, briefly boiled, rinsed clean, and then simmered with a bold red sauce until tender.

    It is perfect as a rice side dish, a hearty dinner dish, or a spicy Korean drinking food served with soju.


    What is Spicy Galbijjim?

    Galbijjim is a Korean braised rib dish.

    The word “galbi” means ribs, and “jjim” refers to a Korean braised or steamed dish cooked slowly with seasoning.

    Traditional galbijjim is often soy sauce-based and mildly sweet, but this version is spicy. It uses gochujang and gochugaru to create a bold, spicy red sauce that coats the pork ribs beautifully.

    Spicy pork galbijjim is especially good when you want something hearty, flavorful, and satisfying with rice.


    Recipe Information

    Prep Time: 30 minutes

    Cook Time: 60 minutes

    Total Time: 90 minutes

    Servings: 2

    Difficulty: Easy to Moderate

    Cuisine: Korean

    Main Ingredient: Pork ribs

    Best Served With: Steamed rice or soju


    Ingredients

    Main Ingredients

    900g pork ribs

    1 potato

    1 onion

    1 green onion

    Water, as needed

    Spicy Sauce Ingredients

    7 tbsp soy sauce

    2 tbsp minced garlic

    4 tbsp gochugaru

    4 tbsp gochujang

    1 tbsp oligosaccharide syrup or corn syrup

    2 tbsp sugar

    2 tbsp sesame oil

    1/2 tbsp black pepper

    Optional Ingredient

    Cheongyang chili pepper, to taste


    Ingredient Notes

    Pork Ribs

    Pork ribs are the main ingredient of this dish.

    Soaking them in water helps remove excess blood and gives the final dish a cleaner taste.

    Briefly boiling and rinsing the ribs before braising is also important because it removes impurities and improves the flavor of the sauce.


    Potato

    Potato absorbs the spicy sauce and becomes soft and flavorful.

    Add it after the pork has simmered for a while so it does not break apart too early.


    Onion

    Onion adds natural sweetness to the sauce.

    It also softens during cooking and blends into the braising liquid.


    Green Onion

    Green onion adds aroma and freshness.

    Add it near the end so it does not lose all of its flavor.


    Gochujang

    Gochujang gives this dish its deep spicy, savory, and slightly sweet flavor.

    It creates the base of the red braising sauce.


    Gochugaru

    Gochugaru adds extra heat and a bright red color.

    Use Korean red pepper flakes for the best result.


    Soy Sauce

    Soy sauce provides saltiness and savory depth.

    Because the sauce reduces as it cooks, taste near the end before adding any extra seasoning.


    Sesame Oil

    Sesame oil adds nutty aroma and richness.

    It makes the spicy sauce taste deeper and more rounded.


    How to Make Spicy Galbijjim

    Step 1: Soak the Pork Ribs

    Place the pork ribs in a large bowl.

    Cover them with cold water.

    Let them soak to remove excess blood.

    If the water becomes very red, change the water once or twice.

    This step helps the final dish taste cleaner.


    Step 2: Prepare the Vegetables

    Cut the potato into large chunks.

    Cut the onion into large pieces.

    Slice the green onion into large pieces.

    If using Cheongyang chili peppers, slice them as well.


    Step 3: Make the Spicy Sauce

    In a mixing bowl, combine:

    • 7 tbsp soy sauce
    • 2 tbsp minced garlic
    • 4 tbsp gochugaru
    • 4 tbsp gochujang
    • 1 tbsp oligosaccharide syrup
    • 2 tbsp sugar
    • 2 tbsp sesame oil
    • 1/2 tbsp black pepper

    Mix well until the sauce becomes smooth and evenly combined.


    Step 4: Parboil the Pork Ribs

    Bring a pot of water to a boil.

    Add the soaked pork ribs.

    Boil for about 5 minutes.

    This removes impurities and excess foam from the meat.


    Step 5: Rinse the Pork Ribs

    Drain the boiled pork ribs in a strainer.

    Rinse them under clean water.

    Remove any remaining foam or impurities from the surface.


    Step 6: Start Braising

    Place the rinsed pork ribs in a clean pot.

    Add the spicy sauce.

    Add sliced Cheongyang chili pepper if you want extra heat.

    Pour in enough water to fully cover the pork ribs.


    Step 7: Boil First Over High Heat

    Turn the heat to high.

    Bring everything to a strong boil.

    Once it starts boiling, cover the pot with a lid.

    Reduce the heat to medium.

    Simmer for about 20 minutes.


    Step 8: Add the Potato

    Open the lid.

    Add the potato chunks.

    Continue simmering for about 10 minutes.

    The potato should become tender but not completely broken apart.


    Step 9: Add Onion and Green Onion

    Add the onion and green onion.

    Simmer for another 5 to 10 minutes.

    Cook until the pork is tender and the sauce has reduced to a rich, spicy glaze.


    Step 10: Reduce the Sauce

    Continue cooking until the sauce thickens slightly.

    The sauce should coat the pork ribs well.

    If there is too much liquid, simmer uncovered for a few more minutes.


    Step 11: Serve

    Turn off the heat.

    Transfer the Spicy Galbijjim to a serving dish.

    Serve hot with steamed rice.


    Pro Tips

    Soak the Ribs First

    Soaking the pork ribs removes blood and helps prevent a strong pork smell.

    This step gives the dish a cleaner flavor.


    Parboil and Rinse the Meat

    Do not skip the quick boiling step.

    Boiling the pork ribs for about 5 minutes and rinsing them removes impurities and makes the sauce cleaner.


    Add Potato Later

    If you add the potato too early, it may break apart before the pork becomes tender.

    Add it after the pork has already simmered for about 20 minutes.


    Use Enough Water at First

    The pork ribs should be covered with water at the beginning of braising.

    As the dish cooks, the liquid will reduce and become a thicker sauce.


    Simmer Until the Sauce Reduces

    Spicy Galbijjim tastes best when the sauce reduces and clings to the ribs.

    Do not stop cooking too early if the sauce still looks watery.


    Make It Spicier

    For a stronger spicy flavor, add sliced Cheongyang chili peppers or a little extra gochugaru.


    What to Serve with Spicy Galbijjim

    Spicy Galbijjim pairs well with:

    • Steamed white rice
    • Kimchi
    • Kongnamul Guk
    • Miyeokguk
    • Korean pickled onions
    • Musaengchae
    • Gyeran Jjim
    • Gamja Jorim
    • Eomuk Bokkeum
    • Lettuce wraps
    • Soju

    It is especially good with rice because the spicy sauce is rich and flavorful.


    Storage Tips

    Store leftover Spicy Galbijjim in an airtight container in the refrigerator.

    It is best eaten within 2 to 3 days.

    To reheat, warm it in a pot over low to medium heat.

    Add a small splash of water if the sauce has thickened too much.

    The flavor often becomes deeper after resting overnight.

    Freezing is possible, but the potato texture may become soft after thawing.


    Frequently Asked Questions

    Can I make this less spicy?

    Yes.

    Reduce the gochugaru and gochujang slightly.

    You can also skip Cheongyang chili peppers if using them.


    Can I use beef ribs instead of pork ribs?

    Yes, but the cooking time may be longer.

    Beef ribs usually need more simmering time to become tender.


    Why do I need to boil the pork ribs first?

    Parboiling removes impurities, blood, and excess odor.

    It helps the final sauce taste cleaner.


    Can I add more vegetables?

    Yes.

    Carrot, mushrooms, Korean radish, or sweet potato can be added.

    Add softer vegetables later so they do not fall apart.


    Why is my pork tough?

    The pork may need more cooking time.

    Continue simmering until the meat becomes tender.

    Add more water if the sauce reduces too quickly.


    Can I make this ahead of time?

    Yes.

    Spicy Galbijjim can be made ahead and reheated.

    The flavor becomes deeper as the sauce absorbs into the meat.


    What can I use instead of oligosaccharide syrup?

    You can use corn syrup, Korean cooking syrup, honey, or a little extra sugar.

    Syrup helps give the sauce a glossy finish.


    Final Thoughts

    Spicy Galbijjim is a bold and satisfying Korean braised pork rib dish made with a spicy gochujang-based sauce.

    With pork ribs, potato, onion, green onion, garlic, soy sauce, gochugaru, gochujang, sesame oil, and a little sweetness, this dish becomes rich, spicy, savory, and perfect with rice.

    The key is to soak the ribs, parboil and rinse them, simmer them slowly with the sauce, and reduce the liquid until the sauce coats the meat.

    If you want a spicy Korean pork rib dish that works as both a hearty meal and a drinking food, this Spicy Galbijjim recipe is a perfect choice.