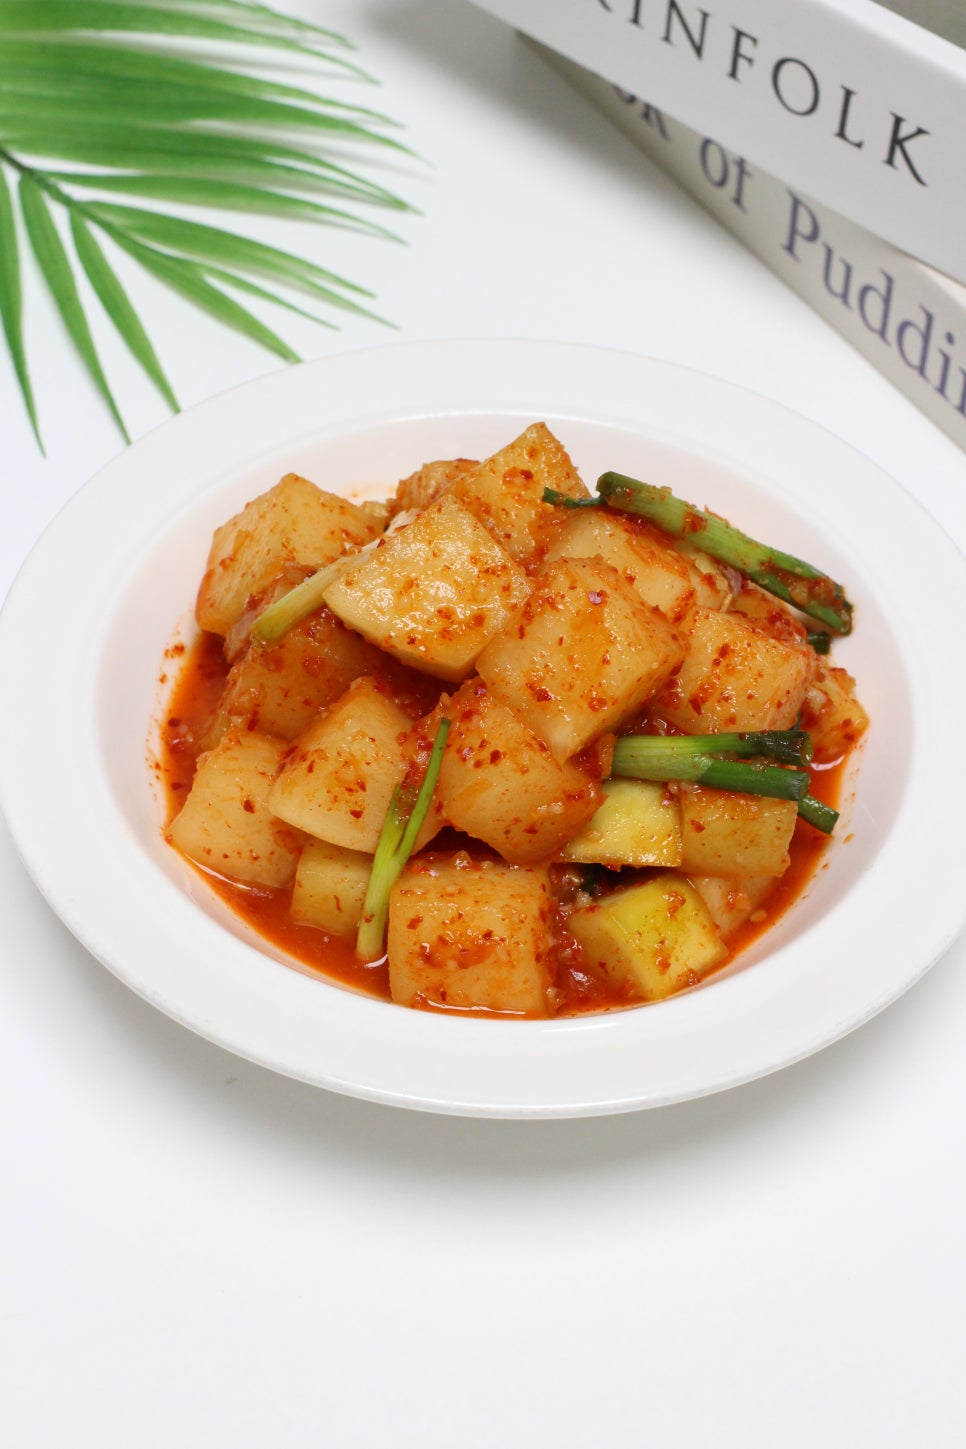

Kkakdugi is a crunchy Korean radish kimchi made with cubed Korean radish, gochugaru, fish sauce, salted shrimp, garlic, green onion, onion, and a simple rice-based seasoning paste.
This recipe is easy to make at home and does not require a separate flour paste. Instead, cold cooked rice is blended into the seasoning, which helps the sauce stick to the radish and supports fermentation.
Kkakdugi is refreshing, spicy, savory, slightly sweet, and perfect with Korean soups, stews, rice dishes, noodles, and grilled meat.
What is Kkakdugi?
Kkakdugi is a traditional Korean cubed radish kimchi.
Unlike napa cabbage kimchi, kkakdugi is made with Korean radish cut into bite-sized cubes. The radish is salted first, then mixed with a red kimchi seasoning made from gochugaru, fish sauce, salted shrimp, garlic, green onion, onion, and a small amount of rice.
Fresh kkakdugi tastes crisp and lightly spicy. After fermentation, it becomes tangy, deeper, and more flavorful.
It is one of the most common Korean side dishes and is especially popular with soups like seolleongtang, galbitang, kalguksu, and Korean stews.
Recipe Information
Prep Time: 20 minutes
Salting Time: 30 minutes
Total Time: 50 to 60 minutes
Servings: 6 or more
Difficulty: Easy
Cuisine: Korean
Main Ingredient: Korean radish
Best Served As: Korean side dish
Ingredients
Main Ingredients
2 Korean radishes
4 tbsp coarse salt, divided
Seasoning Base
2 tbsp cold cooked rice
1/2 onion
3 tbsp salted shrimp
6 tbsp kanari fish sauce
2 to 3 tbsp allulose
Additional Seasoning
Gochugaru, to taste
Minced garlic, to taste
Chopped green onion, to taste
Extra coarse salt, if needed
Ingredient Notes
Korean Radish
Korean radish is the best choice for kkakdugi because it is firm, juicy, and naturally sweet.
When salted and fermented, it stays crunchy and absorbs the kimchi seasoning well.
Cut the radish into bite-sized cubes so it is easy to eat with rice, soup, or noodles.
Coarse Salt
Coarse salt is used to salt the radish before mixing it with the seasoning.
This step helps draw out excess moisture, seasons the radish, and keeps the texture crisp.
Use 3 tablespoons first for salting, then use the remaining salt only if the final seasoning tastes too bland.
Cold Cooked Rice
Cold cooked rice replaces traditional flour paste in this recipe.
It helps the seasoning become slightly thick and stick to the radish. It also helps fermentation.
Blend the rice well with the liquid ingredients. Even if a few small rice grains remain, they will soften and disappear as the kkakdugi ferments.
Onion
Onion adds natural sweetness and depth to the kimchi seasoning.
Blending it into the sauce makes the seasoning smoother and more flavorful.
Salted Shrimp
Salted shrimp gives kkakdugi its deep savory flavor.
It is one of the key ingredients in many Korean kimchi recipes.
Kanari Fish Sauce
Kanari fish sauce adds saltiness and umami.
It helps season the radish and gives the kimchi a more authentic fermented flavor.
Allulose
Allulose adds gentle sweetness without making the kimchi too heavy.
You can adjust the amount depending on how sweet the radish is.
If you do not have allulose, you can use sugar, plum extract, or Korean cooking syrup.
Gochugaru
Gochugaru gives kkakdugi its red color and mild spicy flavor.
Use Korean red pepper flakes for the best taste and appearance.
How to Make Kkakdugi
Step 1: Cut the Radish
Wash the Korean radishes well.
Peel them if needed.
Cut the radish into bite-sized cubes.
Try to keep the pieces similar in size so they salt and ferment evenly.
Step 2: Salt the Radish
Place the cubed radish in a large mixing bowl.
Add 3 tablespoons of coarse salt.
Gently toss until the radish pieces are evenly coated with salt.
Let the radish sit for 30 minutes.
Step 3: Toss Halfway Through
After 15 minutes, toss the radish again.
This helps the radish salt evenly on all sides.
The radish will begin to release moisture and become slightly flexible while still staying crunchy.
Step 4: Make the Rice-Based Seasoning
While the radish is salting, prepare the seasoning base.
In a blender, add:
- 1/2 onion
- 6 tbsp kanari fish sauce
- 3 tbsp salted shrimp
- 2 tbsp cold cooked rice
- 2 tbsp allulose
Blend until mostly smooth.
Blend a little longer than usual so the cooked rice breaks down well.
Step 5: Add Gochugaru, Garlic, and Green Onion
Pour the blended seasoning into a mixing bowl.
Add gochugaru, minced garlic, and chopped green onion.
Mix well.
Taste the seasoning and adjust if needed.
If you want a sweeter flavor, add a little more allulose. If you want a stronger red color, add more gochugaru.
Step 6: Mix the Radish with the Seasoning
Add the seasoning to the salted radish.
Mix gently until every radish cube is evenly coated.
Taste one piece of radish.
If it tastes too bland, add a small amount of coarse salt.
The flavor should be slightly salty at this stage because kkakdugi becomes more balanced after fermentation.
Step 7: Pack into a Container
Transfer the seasoned radish into an airtight kimchi container.
Press down gently to remove large air gaps.
Do not fill the container all the way to the top, because kkakdugi can release liquid as it ferments.
Step 8: Ferment the Kkakdugi
Leave the kkakdugi at room temperature for about 1 day.
The exact time depends on your kitchen temperature.
When it starts to smell slightly tangy and releases more liquid, move it to the refrigerator.
For a fresher and crunchier taste, refrigerate it sooner.
For a more sour and fermented taste, leave it at room temperature a little longer.
Step 9: Serve
Serve chilled as a Korean side dish.
Kkakdugi is especially delicious with hot rice, Korean soups, stews, noodles, and grilled meat.
Pro Tips
Use Fresh Korean Radish
Fresh radish gives the best crunch and natural sweetness.
If the radish tastes sweet and juicy before seasoning, the finished kkakdugi will taste better.
Do Not Skip the Salting Step
Salting is important because it seasons the radish and helps the texture stay crunchy.
It also allows the kimchi seasoning to absorb better.
Use Cold Rice Instead of Flour Paste
This shortcut makes the recipe easier.
You do not need to cook a separate flour paste. Cold cooked rice works well when blended with fish sauce, salted shrimp, and onion.
Blend the Rice Well
The rice should be blended until mostly smooth.
Small pieces are fine because they will soften during fermentation.
Season It Slightly Salty
Freshly mixed kkakdugi should taste a little salty.
As it ferments, the flavor becomes more balanced and delicious.
Adjust Sweetness Carefully
Radish sweetness changes by season.
Taste the seasoning before mixing and add more allulose only if needed.
What to Serve with Kkakdugi
Kkakdugi pairs well with:
- Steamed white rice
- Seolleongtang
- Galbitang
- Kalguksu
- Ramyeon
- Kimchi Jjigae
- Doenjang Jjigae
- Kongnamul Guk
- Miyeokguk
- Galbijjim
- Bulgogi
- Samgyeopsal
- Korean BBQ
It is especially good with rich soups because the crunchy, tangy radish balances the warm broth.
Storage Tips
Store kkakdugi in an airtight container in the refrigerator.
It can be eaten right away, but the flavor becomes deeper after 1 to 3 days.
For the best texture, enjoy it within 2 to 3 weeks.
Always use clean utensils when taking kkakdugi from the container.
As it ferments, it will become more sour. Sour kkakdugi is excellent with soups, stews, fried rice, or noodles.
Frequently Asked Questions
Can I make kkakdugi without flour paste?
Yes.
This recipe uses cold cooked rice instead of flour paste.
The rice helps the seasoning stick to the radish and supports fermentation.
Can I use regular radish instead of Korean radish?
Korean radish is best.
Regular radish can be used, but the texture, sweetness, and water content may be different.
How long should I salt the radish?
About 30 minutes is enough for this recipe.
Toss the radish once halfway through so it salts evenly.
Should I rinse the radish after salting?
For this recipe, rinsing is not necessary unless the radish tastes too salty.
If you rinse it, drain it very well before adding the seasoning.
Why should kkakdugi taste slightly salty before fermentation?
Kimchi tastes better after fermentation when it is seasoned a little firmly at the beginning.
If it tastes too bland before fermenting, it may taste flat later.
How long should I ferment kkakdugi at room temperature?
Usually about 1 day is enough.
In warm weather, it may ferment faster.
In cold weather, it may need more time.
Move it to the refrigerator when it starts to smell pleasantly tangy.
Can I eat kkakdugi right away?
Yes.
Fresh kkakdugi is crunchy, spicy, and lightly seasoned.
After a few days, it becomes tangier and deeper in flavor.
What can I use instead of allulose?
You can use sugar, plum extract, corn syrup, or Korean cooking syrup.
Adjust the amount to taste.
Final Thoughts
Kkakdugi is one of the easiest Korean kimchi recipes to make at home.
With Korean radish, fish sauce, salted shrimp, onion, garlic, green onion, gochugaru, and a simple cold rice seasoning base, you can make crunchy and flavorful cubed radish kimchi without cooking flour paste.
The key is to cut the radish evenly, salt it properly, blend the rice-based seasoning well, and season it slightly firmly before fermentation.
If you want a simple Korean side dish that is crunchy, spicy, refreshing, and perfect with rice or soup, this Kkakdugi recipe is an excellent choice.
답글 남기기